Showing posts with label raw. Show all posts

13 October 2013

Raw Caramel Apple Cheezecake

A couple of days ago, I posted a "Recipe Rewind", on CL's social media channels, to last year's Raw Caramel Apple recipe.
It is that time of year, after all.

The rewind/revisit sparked thoughts of the many other treats I could infuse with caramel-appley goodness. I actually sat down and made a list, each one of which I hope to be able to create and post here. For now though, I settled on the one that kept drawing my attention, and assuming you read the title of this entry before arriving at this point, there's no real surprise to be had.


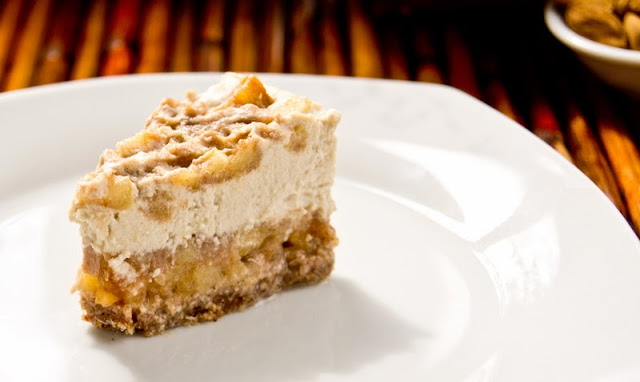
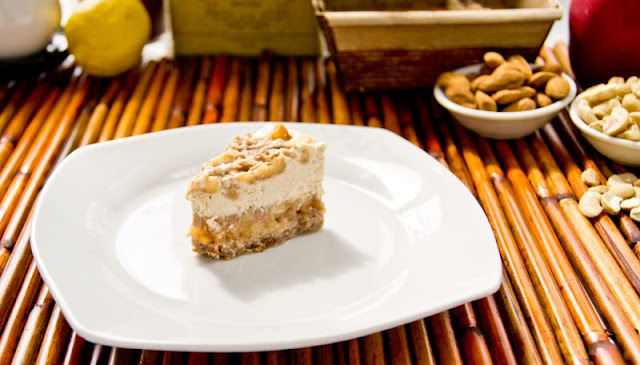
So, yes, I made a scrumptiously decadent Raw Caramel Apple Cheezecake. It is a nut-based dessert, but it is not heavy or dense. The caramel apple layer also lends to less-density. In fact, I specifically made this version so that the cheezecake filling would be slightly less firm. The result was light (and delicious) and not quite so rich, so was kind of easy to eat more than one might intend.1 I should have waited until Friday, because the BF sure would have loved it.2 Thankfully, I only made a mini, two-serving cake.


While, I prefer slightly softer cheezecakes, the recipe does include options for a firmer cake. The firmer option ups the fat content3 and probably the richness, so you might to not be tempted to eat as much.4 Calorically though, it's pretty much even.5 


You can get pretty creative, in terms of pans for the two-serving cake. I used a mini-loaf mold. Other similarly-sized options are: a 4" ramekin,

Notes:
- When making a small/two-serving cake, I've found the mini-blender to be the most useful. If you don't have access to a mini blender, I'd suggest at least doubling the recipe; sometimes standard blenders have difficulties thoroughly blending small amounts of ingredients.
-The blending blade shaft can get quite hot, if used continuously for too long. This won't affect the final product at all, but it can get hot enough to begin to denature the enzymes of the food touching it, which could affect the "rawness" of the cake. One solution to this is to use the 'pulse' feature of your blender, until things are mostly blended and broken down, and then blend continuously to achieve the smooth/creamy consistency.
- For a "Full-sized" cheezecake (as opposed to Cucina Libera-sized), triple the recipe, and use a 7" springform pan.
- 2 teaspoons of coconut oil in the filling yields the less-firm CL cake. For a firmer cake, use 3-4 teaspoons of oil depending on preference. You could even add up to 5 teaspoons, if you prefer a denser, richer cake.

Important! Before you begin, make sure all ingredients are at room temp, so that when you add the coconut oil at various stages, it blends and emulsifies, instead of solidifying into little oily crystals throughout your mixture. Everything should be soaked at room temp, so this shouldn't be an issue, but just a little heads-up.


Raw Caramel Apple Cheezecake
(serves 2)

For the Caramel:
  • 8-9 Medium Pitted Dates (I used Deglet Noor; soaked overnight**)
  • Pinch of Sea Salt
  • Scant 1/2 tsp Virgin Coconut Oil
  • Dash of  Vanilla Extract or few Vanilla Seeds (optional)
For the Filling:
  • 3/4 Cup (85g) Raw Cashew Pieces (weighed prior to soaking; soaked overnight*)
  • 2-4 Tbsp Date Syrup (from the soaked dates; see below)
  • 1/2 Cup Diced Apple
  • 1/4 Cup Filtered Water
  • 2-4 tsp (9-19g) Virgin Coconut Oil (warmed gently to liquid)
  • 1 Tbsp Lemon Juice
  • 1/2 tsp Vanilla Extract OR seeds from 1/3 Vanilla Pod
For the Crust:
  • 1/8 Cup (14g) Raw Almonds (I used sprouted almonds)
  • 3 Tbsp (14g) Sprouted Buckwheat Groats OR 3 Tbsp (14g) Shredded Coconut OR 2 Tbsp (14g) Raw (GF) Oat Groats
  • 1/4 tsp Ground Cinnamon
  • Generous pinch of Sea Salt
  • 1-3 Medium Dates (depending on how sweet you prefer your crust)
  • 1/2 tsp Virgin Coconut Oil 
* Soak Cashew Pieces for 8 hours or overnight, in enough filtered water that they are completely covered. Drain and discard the soaking water.
**Pre-soak Dates, in 1/2 Cup of filtered water, for 20-30 minutes to loosen the skin; carefully peel the dates and return them to the soaking water. Continue soaking for 8 hours or overnight


1. Combine the dry ingredients for the crust in a clean, dry mini-blender or high-powered blender. Pulse until the almonds are well chopped and the mixture is the consistency of a coarse flour.

2. Add the dates and the coconut oil to the dry mixture and blend until the dates are chopped and the mixture begins to stick together in a sort-of "dough' ball.

3. Press the crust evenly into the bottom of your desired pan/mold. It should be approx. 1/4 inch thickness. Set aside while you prepare the caramel and the filling.

4. The dates should be soft and have formed a syrup. Leaving the dates behind, remove 2-4 Tbsp of the date syrup. Set the syrup aside.

5. Using a clean mini blender or a high-powered blender, blend the soaked dates (including any remaining liquid/syrup) sea salt, coconut oil, and vanilla (if using) until the mixture is smooth... you know, like caramel. Set the caramel aside.

6. Into a mini-blender, using the chopping attachment, or a high-powered blender, add the drained cashews, the syrup from step #1,  lemon juice, vanilla, and 1 tablespoon of filtered water. Begin blending, adding as little water as necessary, one tablespoon at a time, to get the mixture to a smooth, creamy. Once the filling is blended and smooth, it's time to assemble.

7. Get your pan with the set crust. Directly on top of the crust, layer the chopped apples to about 1/2 to 2/3 inch thickness; keep some apples aside to top the cheezecake.
Spoon about 3/4 of the caramel over the apples, allowing it to mix in with the apples a bit and making sure it is spread evenly to the edges.
Pour/spoon all of the cashew filling over the apples, and spread it evenly to the edges of the pan/mold.
Use some/all of the remaining apples and caramel to garnish the top of your cheesecake.

8. Allow the cheezecake to set in the refrigerator for at least 2 hours before serving. A larger cake should be allowed to set from 4-8 hours. I know it's difficult to wait, but the time is important to allow the cake to set, firm, and for the flavours to develop and meld.
OR you can opt for what I did: I froze my little cake, and then allowed it to thaw in the fridge overnight. The texture and consistency turned out really well.

ENJOY!


1. It might be the healthier, raw-food version, but it's far from a low-calorie treat. Sorry :-( 
2. Yeah, that would be "Sorry" #2
3. All good fats, of course.
4. In case you think that's a good thing. 
5. Sorry to burst your bubble (if you were excited about endnote 4). I guess we're up to "Sorry" #3?
Read more ...

23 September 2012

Ch-ch-ch-ch-anges... New Experiences... Dragon Fruit

After months of promises of new posts, I've actually settled down to write (and share a recipe!) with something of a theme in mind.
In the midst of international travel, a cross-country move, unpacking an entire life, settling in... my fantasies of keeping up with posts proved far more ambitious than I envisioned. Now that the dust has (mostly) cleared, time has carried us to the change of the seasons.1

So, yesterday was the first day of Fall. 2 On the last day of Summer, I walked in to my new, and dangerously tempting, neighborhood natural foods market. As usual, I was running in to buy ONE item; naturally, I walked out with many more. Back to the point, As soon as the doors slid open, I was greeted by a display of vibrantly colored Dragon Fruit. Green and Pink happen to be my favorite color complements 3, so I was immediately drawn to this pile of lovely-looking fruit.

I'd never eaten a dragon fruit before, and I can't recall ever seeing them in such ample display.

Typically, I'd see five or six off to the side where the other exotic fruit live, but this vibrant display of pink and green spiky fruits was almost mesmerizing. The store's clever marketing tactic worked it's magic. Without thinking, I picked one to put in my basket. I hadn't completely succumbed, however; despite being on sale, their price tag could lead to a costly haul, if uncontrolled, and my pocketbook has more of a hold over me than any fancy fruit ever could.   
The Fruity Spoils - not in the rotting sense.

New home. New life. New season. New fruit. It's interestingly symbolic. 4

I unpacked my two fancy new fruits, and not wanting to just eat them, I decided they needed to me transformed into a recipe befitting their uniqueness. Of course, not having ever tasted a dragon fruit before, I needed to crack... slice... one open, in order to understand the flavor before I could get to work.
W-O-W. Bright, BRIGHT magenta-coloured flesh; delicate, slightly-sweet flavor - one that could easily be overpowered by too many ingredients. I had to keep it simple.5
Not a problem because...well... being the proprietor of a food and cooking blog, I probably shouldn't admit6 that I don't do much cooking,7 when I don't have someone for whom to cook. My main culinary "test subjects"/ meal recipients are 2000 miles away8 and on tour, respectively. When left to my own devices, I tend to stick to pretty simple, 97% raw foods; it's quick and convenient.
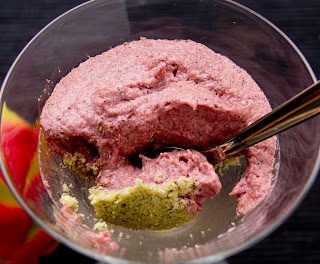
From that tendency comes this "custard" pie recipe.
OK, so it's really not that unique of a recipe, but it does employ and retain the unique exterior color of the fruit, which, I dare say, is one of its most appealing features.

P.S. It's important to use soaked, sprouted pumpkin seeds (and other seeds/nuts, for that matter). Raw nuts and seeds contain enzyme inhibitors, which make them difficult to digest. Part of the simplicity of this recipe was due to the fact that I typically have soaked, sprouted (and dried) seeds on hand. If you don't, don't despair. Roasted pumpkin seeds are fine as well. If you prefer to stay raw, just soak the seeds in filtered water for 2-3 hours, drain the soaking water, pat them dry, and use them "damp".


Raw, Dragon Coconut Pie (Individual- (fancy) -serve)
(serves 2)

For the Pie Filling:
  • 2 Dragon Fruits (flesh scooped out)
  • 1/2 Cup Homemade Nut Mylk or Filtered Water (room temp is important!)
  • 2 tsp Ground White Chia (black is OK too, but the result will be more speckled)
  • 1 Tbsp Virgin Coconut Oil
  • 1/8 tsp Vanilla Extract (or seeds from 1/4 of a pod)
  • 1-2 Pitted Dates (optional)
For the Crust:
  • 1/3 Cup Shredded Coconut
  • 1/4 Cup (28g) Raw, soaked Pumpkin Seeds
  • 2 tsp Virgin Coconut Oil
  • 1 Pitted Date (optional)
  • Scant 1/8 tsp Sea Salt
Cook time: 0 mins

If necessary, gently warm the coconut oil, so that it becomes liquid.

Prepare the Crust.
In a mini blender, using the grinder attachment, or a food processor, process the shredded coconut, pumpkin seeds, and sea salt, until the mixture reaches a flour-like consistency. The natural oils will release, and the "flour" should clump together a bit.

When your flour is ready, add in the coconut oil, and the date (I omitted the date from this version for a not-sweet crust). Process until the ingredients are evenly distributed; the flour will clump together more - if using the date, the dough will begin to form a more solid "ball".

Evenly press the crust mixture into two glasses or small glass bowls. Set aside in the refrigerator, while you...

Prepare the Filling.
Ensure all of the ingredients are room temperature, before beginning.
In a blender, or mini-blender, combine all the ingredients (including the dates, if you're using them) and blend until smooth.

Remove the crusts from the refrigerator, and evenly divide the mixture between the two glasses. Return the completed "pies" to the fridge and allow to chill and set for at 1-2 hours.

Serve and ENJOY!


1. Yet another change.
2. As far as the calendar is concerned, anyway. I'm still VERY happily enjoying the summer-like weather here.
3. I've instantly flashed back to an advertisement from the 80s, for a product I can't remember, in which a "Valley Girl" declares, "Pink and Lime Green are the ultimate colors." ... A girl after my own heart.
4. No?
5. And keeping food simple is kinda my thing. 
6. But I will anyway.
7. As in subjecting food to chemical changes and/or:
    cook     verb (used with object) 1. to prepare(food)by the use of heat, by boiling, baking,or roasting.       2. to subject(anything)to the application of heat.
8. [sadface]

Read more ...

25 May 2012

Raw Tempura Maki Rolls

Before I adopted a vegan diet, and even before I became a vegetarian... way back when I was still a small child, I never cared for fish. It was the fishy-taste. Fishy sugo was the worst. I hated the baccalĂ  that appeared in our sugo every Christmas eve, and you wouldn't have caught me anywhere near a plate of linguini alle vongole. Barf.

So what? Right? I've been vegan for more than half of my existence at this point. Why am I even blathering about fish/seafood?1
Nori.
One of those chlorophyll/iodine/protein-rich weeds of the sea.2 You know, the ones that, if harvested from the right sources, are a great addition to a healthy diet.

I actually ate ALL of these.
Except...the first time I tried nori, I spat it out.3 I knew it was nutritionally dense, I wanted to be able to add it to my diet, but it was just too fishy. I couldn't stomach it. Until one day, my friend convinced me to accompany her to a sushi restaurant. She knew I was vegan, but insisted I would be able to eat something. I told her I had a hard time with nori, and she insisted I would be fine.
She wasn't entirely wrong. She introduced me to inari (rice stuffed in a tofu pouch), which I thought was pretty darn cool, at the time. She also encouraged me to try an inside out roll. I was skeptical, and slightly concerned.
Surprise!
With the rice on the outside (and slathered in wasabi), the nori inside was barely detectable.

This was uber-exciting, and I proceeded to incorporate nori into my diet by way of various inside-out veggie rolls. Somehow, I must have developed a tolerance, if you will, because years and years later, I found myself enjoying sheets of roasted nori... alone. I even chew chlorella tablets and add kelp flakes to salads.4
I say tolerance because every now and again, a little too much "fish-taste" comes through, or I get a bite of salad with a high concentration of kelp flakes, and I can't handle it.
Although the complete recipe does require a bit of pre-prep, you can certainly take a few short cuts, and still turn out5 a delicious roll.


In the spirit of full disclosure, this batch was the high-raw pseudo-tempura version because I didn't want to wait to dehydrate the tempura, and I used SeaSnax Wasabi Seaweed Snacks to make the rolls. SeaSnax are roasted but they're still amazing because unlike other nori snacks, they contain NO canola oil or maltodextrins - just nori, olive oil, salt and wasabi. YUM, indeed.

These rolls are a combination of conventional and non-conventional ideas/ingredients. White rice is nutritionally empty, so it's right out. Brown rice is ok, but it's neither my favorite nor something I would make at home. I would probably have used quinoa, but I wanted to make raw rolls... raw rolls that weren't based heavily on nuts and seeds.6

I have an effective little "trick" to soften/tenderize the asparagus, without using salt/tamari/aminos... freeze it.
Yep; that's it. Easy, eh?
Simply freeze fresh asparagus spears for 1-2 days, then allow them to thaw at room temp. They end up soft(er), almost as though they've been cooked... uh... except they haven't been. It's pretty neat.

That's just what I did with these little guys. However, as I mentioned above, I didn't want to wait for the dehydrator this time, so I just tossed the tenderized asparagus with the dry tempura ingredients until they were coated. The recipe shares the full tempura directions :-)


Raw Tempura Rolls
(serves 3-4)
  • 1 head of Cauliflower
  • 2 (large) Portabella Mushroom Caps (stems removed)
  • 1 Avocado
  • 5 stalks of Asparagus (frozen, then thawed)
  • 2 Tbsp Coconut Aminos
  • Sea Salt
  • 1/2 tsp Apple Cider Vinegar (or Unseasoned Rice Vinegar, if desired)
  • 1/2 tsp Coconut Nectar (or 3-4 drops of Liquid Stevia)
  • 1/2 Cup Coconut Flakes 
  • 1/4 Cup Nutritional Yeast
  • 1/4 Cup Ground Chia or Ground Flax Seeds
  • Dehydrated nori sheets (I used SeaSnax for this batch)
  • Raw Sesame Seeds (optional)
Pre-Prep:
Cut the cauliflower head to remove the florets, then cut away the extra stems from the florets. A bit of stem is OK, but there should be very little.
Cut or crumble the florets into small pieces and add them to a food processor fitted with an S blade.
Pulse the cauliflower until it is evenly processed into a consistency resembling rice. It's fine if the "grains" are smaller; it's more important that they are mostly uniform in size. Although, it's difficult to over process, but it's still a good idea to take your time, in order to get the best consistency.

Transfer the cauliflower rice into a separate bowl. add the vinegar, coconut nectar (or stevia), and an extra 1/2 tsp of filtered water. Toss the mixture until the liquids are evenly distributed. Cover and allow the cauliflower to marinate in the refrigerator for 1-2 hours or overnight.

Slice the portabellas into thin strips. Place the strips in a shallow dish. Add the coconut aminos and gently toss to make sure the all the mushroom strips are evenly coated. Cover the dish and allow the mushrooms to marinate in the refrigerator.for 1-2 hours or overnight.

SHORT CUT #1:  Forget the marinating time, and skip straight to assembly.

Tempura:
In a food processor fitted with the S blade, combine the shredded coconut and nutritional yeast. Process for 30-60 seconds, or until the coconut reaches a finer consistency. Take care not to over-process.
Stir 2 Tbsp of the ground chia into the coconut mixture.

Add the remaining ground chia to a medium-sized bowl, and stir in 1/2 Cup of filtered water. Continue stirring as the mixture begins to thicken, to avoid lumps. Allow the mixture to sit for 5-10 minutes.

Once the chia mixture has thickened,  "batter" the asparagus spears by dipping them in the chia "egg" mixture, and then rolling them in the dry mixture, until they are evenly coated. Arrange the coated asparagus on a dehydrator tray lined with the mesh/screen fitting.
Dehydrate at 110F/ for 2-3 hours, or until the "tempura" is dry and crisp. The idea is to get the coating as dry as possible without shriveling the asparagus.

Assembly:
Cut the asparagus to match the length of your nori sheets. Since I used the SeaSnax, I cut mine smaller but allowed extra length on the pieces with the spear end, so it would stick out of the top, and look cool.

Cut the avocado in half, and slice each half into thin slices. I make the slices directly in the skin, and then carefully scoop the flesh out of the skin, so it comes out already sliced. Super-easy, and really helpful if the avocado is soft and ripe.


SHORT CUT #2:  Skip the chia "egg", and forget the dehydrating. Roll the damp, cut asparagus in the dry tempura ingredients, and add it to the roll.

Lay out one sheet of nori onto a flat surface. If you're using larger sheets, a bamboo sushi roller, would be helpful. Again, since my sheets were small, I was able to hand roll them easily. It was also not necessary to cut the rolls into pieces once they were finished.
  1. Spread an even layer of the cauliflower rice over 1/2 of the sheet (or 3/4 of the sheet if using SeaSnax). 
  2. Arrange one asparagus spear, 1-2 slices of avocado, and one slice of mushroom in the center of the rice. 
  3. Carefully roll toward the riceless edge of the nori sheet, and allow the edge of the nori to seal itself to the roll. The ingredients should have dampened the nori, making this step quite simple.
Repeat the steps above for each roll.

If using standard nori sheets, use a sharp knife to cut the roll into bite-sized pieces.
Sprinkle the rolls with sesame seeds, if desired. Serve as-is or with pickled ginger and wasabi.

Enjoy!!


1. Well, I do still find the smell pretty nauseating.
2. Aren't I clever?
3. I also have a grappa story that goes something like that.
4. Ohmygosh. Who am I??? Seriously.
5. I suppose "roll out" is more apropos here.
6. And I have to avoid sunflower seeds now anyway :-( 
Read more ...

25 April 2012

Raw Apple Pie Tarts

My goodness! I can't believe it has been over a week since I've posted. I suppose I've been caught up in trip planning, my girl bff's upcoming nuptials, extra teaching, summer program planning... and despite being fairly well-organized, I've still felt as though something was not quite right - missing.
Uh... yeah... THIS.
Hmph.
I haven't been in the kitchen to actually prepare a dish. A gathering had been set for this past Sunday, and I was planning on preparing some fun, chocolatey treats, the recipe of which would then find it's way to being shared here. Alas the gathering was cancelled, and the chocolatey treats were (temporarily) abandoned.1

This, however, may have been fortuitous2 because I'd been postponing another recipe... or more appropriately, I waited to share it and was then distracted by other recipes I was creating. So, this presentation is brought to you by a specifically arranged series of events/occurrences.
Enjoy.

I know. A small dessert. Why are all of the "dessert" items I make small?
Someone might say it's because I'm small. I say that small things are cute.
And I'm sure I've mentioned this before, but I've also been known to a bite or two of a sweet and then try to pass the rest to the nearest bystander (usually the BFF). Small treats eliminate that tendency.

In addition to being nut free, I'd say these tarts fall are somewhat closer to a fruit salad than a pastry. They're quite fresh and light. The crust isn't heavy. The fruit isn't overly sweet or bogged down under a thick, syrupy "glaze". I made a batch for our YTT graduation party, and despite my last-minute concerns over bringing a raw dessert, they were very well-received.

Don't be intimidated by the number of steps/prep time required. They're really not at all difficult to prepare.
Really.
I actually thought later that they would be quite nice crumbled (or smushed) over a chia pudding or raw ice cream. Although, after taking the time to put them together so nicely, it would be a shame to just smash them up. They could make a nice presentation sitting atop a scoop of raw ice cream... OR if a crumbled topping idea does sound interesting at all, you can (of course) prepare the components as directed and skip the crust pressing and assembly steps :-)


For our current purposes, however, we are going to continue with pies!3

Mini Raw Apple Tarts
(makes 12)

For the Filling
  • 3 large Granny Smith or Fuji Apples
  • 6-8 (75g) Pitted Dates
  • 1/2 Cup Filtered Water
  • 1 1/2 tsp Ground Cinnamon
  • 1/4 tsp Ground Ginger
  • dash of Nutmeg
  • 1 tsp Lemon Juice
  • pinch Sea Salt
For the Crust
  • 1 1/2 Cups (120g) Shredded Coconut
  • 5-6 (40g) Pitted Dates
  • 1 Tbsp (15g) Virgin Coconut Oil
  • 1/4 tsp Vanilla Extract (optional)
  • 1/4 tsp Sea Salt
For the (optional) Creme Topping
  • 1 Young Coconut (Meat & Water)
  • 2 tsp Ground White Chia (black chia is fine; it will just make the topping more "speckled")
  • Seeds from 1/3 Vanilla Pod (or 1/2 tsp Vanilla Extract)
  • pinch Sea Salt

Soak the dates (for the filling only) in the 1/2 cup of water for 4-6 hours or overnight.
Peel, core, and dice the apples into small, bite-sized pieces.

In a blender or mini blender, puree the soaked dates, with their soaking water, until smooth. Add the cinnamon, ginger, nutmeg, lemon juice, and salt; give the blender a a few quick pulses to make sure all the ingredients are thoroughly incorporated.

Add the date mixture to the diced apples, and gently stir enough to ensure the all of apples are evenly coated. Allow the apples to marinate, covered in the refrigerator, for at least 8 hours or overnight.
Wait until the apples have marinated sufficiently, before you begin to prepare the crust.

In a blender or mini blender using the grind attachment, pulse the shredded coconut until it develops a fine, more flour-like consistency. Take care not to over-blend, or it will begin to turn into coconut butter.

Add the coconut, dates, coconut oil, vanilla and salt to a food processor, and blend until the dates have combined smoothly and evenly. If your dates are on the harder/drier side, soak them in room temperature, filtered water for 10-15 minutes; remove them from the soaking water before blending with the other crust ingredients.

Use a mini tart pan, or line 12 muffin tins with muffin cups. Press the crust mixture evenly into the tins/cups to create a crust that is approximately 1/8" thick. If using muffin cups, create a crust that is between 1/2" to 3/4" tall.
When all the crusts are prepared, spoon the apple filling into each crust, allowing the filling to come slightly above the rim of the crust. Allow the tarts to chill and set in the refrigerator for 2-3 hours or overnight.
Trim any excess paper from the muffin liners, once the tarts are set.

If using/adding the Creme Topping, set the tarts in the refrigerator, while you prepare as follows:
Crack open the coconut. Pour the coconut water into a separate bowl, and scoop out the coconut meat.

In a high-powered blender, combine the coconut meat, chia, vanilla and salt, along with half of the coconut water.The goal is to blend the coconut meat until it is completely smooth. The trick is to use as little liquid as possible, in order to retain a thick consistency. This may require some patience.

If you find the mixture getting stuck or unable to blend, gradually add some of the remaining coconut water, in small increments - just enough to get the mixture blending.

Once the mixture is well-blended and smooth, spoon a dollop onto each tart, and allow the tarts to continue to chill for the recommended time (above).
Feel free to blend in a few drops of stevia, a couple teaspoons of coconut nectar, or 1-2 soaked dates, if you prefer a sweeter creme.
Enjoy!!


1. Fear not, dear readers. Those treats are on their way, so keep an eye out :-) 
2. You decide.
3. Tiny pies, obviously.
Read more ...

14 April 2012

Super Simple Raw Blueberry Spread

Sometimes the best things are unplanned.1 I made this inadvertently, while preparing a separate recipe (which will hopefully soon be "on the radar").

It was designed to be one component of a frozen treat. However, once the ingredients (THREE to be exact) were assembled, and before I added it to the rest of the recipe to be frozen, I was pleasantly surprised at the consistency that had developed.

No pectins, gums, or thickeners. No refined sugars. No cooking. It was so lovely, I almost hated to freeze it. Of course, I had already committed to creating the first recipe, so when I completed that one, I immediately set about making another batch to use as a spread.


This is another ridiculously simple recipe. It literally takes all of 5 minutes to prepare, AND the only "processing" even remotely related to this recipe is blending the ingredients in a food processor.
The (magical) dates provide both an extra touch of sweetness and the necessary thickening.

I just happened to have on hand some Raw Coconut Apple Bread (nearly) fresh from the dehydrator. The spread complemented it perfectly.It's hard to go wrong with coconut and blueberries though - at least, as far as I'm concerned.


Raw Blueberry Spread/Jam
(makes 1 Cup)
4 Pints Raw Blueberries
4-6 Pitted Dates (soaked for 15-20 minutes)
1/2 tsp Lemon Juice (optional)

Add the dates and 1/4 of the blueberries to a food processor or high-powered blender, process into a relatively smooth paste/puree - the goal is to get the dates pulverized and smooth.
Add the remainder of the ingredients, and puree/process to the desired texture.

Transfer the mixture to a jar or covered bowl, and refrigerate for at least 15-20 minutes; the dates will cause the mixture to firm up into a jam-like consistency.
That's it. It's that simple!!

Serve with dehydrated crackers, generously spread over a slice of your favorite raw or GF bread, or add a dollop to a chia seed pudding or over your favorite raw ice creme.

Enjoy!

1. I find this to be true to most things in life - not just recipes - but those are perhaps tales for another time :-)
Read more ...

26 February 2012

Balsamic Beet Carpaccio with Rosemary Marinated Mushrooms

Of course, it wouldn't be too long before I put rosemary in something else.1

Because of it's wonderful simplicity, I hesitate to call this a recipe. It's more of a meal idea, which I thought would be nice to share.


It's quick and delicious. The sweetness and ever so slight crunch of the beets paired rather nicely with the buttery chew2 of the mushrooms. I found it to make a lovely lunch on it's own; however, it would also make a lovely appetizer or salad accompaniment to a more substantial dish.

It also looks a bit high end.3 I sat down to my took-5-minutes-to-prepare-lunch4 and was immediately reminded of my New Year's Eve dinner appetizer5 at a local vegan, fine dining establishment.

Except... I liked this better, and it cost only a fraction of what we paid for the other.


Balsamic Beet Carpaccio
(Serves 1-2)
  • 1/2 Red Beet
  • 1 Tbsp Organic Balsamic Vinegar*
  • Sea Salt to taste
Shave the beet into thin slices. I found that a wide Y-shaped peeler works best - unless you happen to have a circular slicer in your kitchen. I tried my mandoline the first time, but the thinnest setting, was still too thick for carpaccio (see the top photo).

Dissolve a pinch or two of sea salt into the vinegar, then layer the beet slices in a shallow dish, and cover with the vinegar. Make sure all the beet slices are coated.
Allow the beets to marinate for 15-20 minutes, or more depending on the desired tenderness.

*If you prefer not to use vinegar, you can make this with a mixture of equal parts fresh orange and lime juices. The flavor will be different, of course, but it will still have similar elements of sweet and tart.

Rosemary Marinated Mushrooms
(serves 1-2)
  • 8oz (224g) White Button or Crimini Mushrooms
  • 1 Tbsp Rosemary Leaves (fresh or dried)
  • 2 Tbsp Coconut Aminos
  • 2-3 thin slices of Fresh Garlic
  • 1 tsp Extra Virgin Olive Oil (optional)
In a medium bowl, combine the coconut aminos, rosemary and garlic. If you're using the EVOO, add that as well. Allow the aromatics to "steep", while you prepare the mushrooms.

Slice the mushrooms in quarters. If you have large mushrooms, you may want to slice them in 1/6ths.
Toss the mushrooms into coconut amino mixture, making sure they're evenly coated.
Allow the mushrooms to marinate for at least 20 minutes.


When assembling the dish, you want to remove the vegetables from their marinates, leaving the liquids behind. Otherwise, there are no hard and fast rules of assemblage. Simply arrange a few (or several) beet slices on a plate, and top with the marinated mushrooms. Garnish with some extra rosemary, if you like - I do! - and serve.

Enjoy!


1. That's not for wont of trying.
2. That might not sound too appealing, but I'm at a loss for a better description.
3. I thought so anyway.
4. I'm not counting the marinating time, since that really classifies more as "waiting" than "preparing"; you could go take a shower or balance your checkbook, or something, with no fear of ruining the dish.
5. It was a raw carpaccio as well, but the similarities end there - different veggie, different preparation, no mushrooms or rosemary (!!).
Read more ...

18 February 2012

Raw, Nut Free Lasagna

Last week, when I made that rather delicious Grain Free Lasagna, I also made an equally delicious Raw Lasagna (grain and nut free).

It was a lasagna free-for-all.

I was really excited about it, and I wanted to share it right away, but I'm sort of glad I didn't. It almost makes it seem as though I'm not fixated on making cooked and raw versions of the same recipe, at the same time.1
Although, I'm not sure enough time has elapsed between lasagna recipes to actually give that impression.2


It looks sorta fancy, but it's really not difficult at all; it simply requires a little bit of prep time. There's no need for a dehydrator. As long as you have a food processor (a mandoline is also really helpful), you're all set.

Again, I wanted to make it nut free. I know I've mentioned before how so many "gourmet" raw foods rely quite heavily3 on nuts. I also didn't want it to taste overwhelmingly of Nama Shoyu/Tamari and garlic. A LOT of gourmet raw food restaurants and recipes go nuts4 with the Nama Shoyu.

Nama Shoyu contains wheat, so it's off-limits for me - and many others. Tamari, instead, is traditionally wheat free. Contrary to once popular opinion that Tamari is not raw, unless it has been pasteurized, it is just as "raw" as Nama Shoyu. Some even say that health-wise, Tamari is superior, since it has been produced in the same tradition for thousands of years. Because Tamari is fermented, I don't go out of my way to avoid it; however, I prefer Coconut Aminos, if I want a tangy, salty addition to foods.

Little side note: Have you noticed how raw food restaurants all have the same smell? It's not just me, right? (It's Nama Shoyu/Tamari and garlic; I'm sure of it.)

So there are no nuts and no Nama. I used a splash of Coconut Aminos in the mushrooms, but it could be omitted, without sacrificing the flavor one bit.


Raw, Nut Free Lasagna
(serves 2-4)
  • 1/2 large Eggplant or 4 medium Zucchini
  • 1 Cup ( 100g) White Button or Crimini Mushrooms
  • 1/2 small Red Pepper
  • 2 tsp Cold Pressed Extra Virgin Olive Oil
  • 1 Tbsp Fresh Rosemary (finely chopped)
  • 2 tsp Coconut Aminos (optional)
  • Sea Salt
for the "Ricotta":
  • 2 1/2 Cups (240g) Cauliflower Florets
  • 1/2 large (40g) Avocado
  • 3 Tbsp Nutritional Yeast (optional - I know it's not technically raw)
  • Pumpkin Seed Pesto (optional - see recipe below; if you choose to skip the pesto, you might want to add a small handful of parsley or basil)
  • Sea Salt to taste
for the Sauce:
  • 1 1/2 Cups (100g) Sundried Tomatoes
  • 5-6 Green Olives
  • 4-6 large Basil Leaves
  • 1/2 small clove Garlic (optional)

Pre-Prep: Soak the tomatoes in 1/4 to 1/2 cup (depending on how dry they are) of filtered water for at least one hour. They can also be soaked overnight.

Thinly slice the mushrooms and red pepper. Then toss them together with the Coconut Aminos, one teaspoon of olive oil, rosemary, and a pinch of sea salt. If you're not using the Coconut Aminos, use 1/3 to 1/2 tsp of salt instead, and mix it with 2 tsp of filtered water to help the salt distribute over the veggies.
Set the vegetables aside to marinate.

Peel the eggplant (or zucchini, if you're using that instead), and slice it lengthwise, using a mandoline set to the thinnest setting.
Gently rub or toss the eggplant in a mixture of 2 Tbsp of filtered water, 1 tsp olive oil, and 1/2 tsp of sea salt.
Spread the eggplant in a shallow pan, leaving the olive oil/salt mixture with it.
Set it aside to marinate, while you prepare the pesto, the ricotta and the sauce.
Pumpkin Seed Pesto
  • 1/2 Cup (56g) Pumpkin Seeds (soaked 2-4 hours)
  • 3 Tbsp Extra Virgin Olive Oil
  • 1 small handful Fresh Basil Leaves
  • 1/2 large Garlic Clove
  • Sea Salt to taste
Combine pumpkin seeds, basil, and garlic in a food processor or mini blender. Pulse until the everything is evenly chopped. Add the olive oil and a pinch of salt, and continue to blend until the consistency is even, scraping down the sides of the food processor, if necessary.
In a food processor, pulse the cauliflower until it is chopped into small, crumbly pieces. Add the avocado and a couple pinches of sea salt. Continue to process until the mixture becomes smooth. It could take a few minutes to smooth out as the cauliflower releases its water, so be patient. Even after it begins to become smooth, there will still be a bit of texture - that's good though!

Add the nutritional yeast and process for a couple of seconds to fully incorporate the ingredients.

Your finished "ricotta" should look like the image to the right. It will be greenish. Green is good for you!

Spoon your ricotta into a bowl, and swirl in the Pumpkin Seed Pesto. If you're not using the pesto, feel free to add some fresh basil, rosemary, or parsley5 to the ricotta while blending.
Set the ricotta aside so you can prepare the sauce.

Toss the soaked tomatoes (including the soaking water), olives, basil, and garlic into the food processor, and process until the mixture reaches a smooth, even consistency.

Now it's time to assemble the lasagna. The wonderful thing about the raw lasagna is that you don't need a pan; you can assemble it right on the serving plate.
Before beginning, make sure your eggplant and veggies are tender. If not, allow them to marinate for a bit longer.

1. Arrange approximately three slices of eggplant (or 6-7 slices of zucchini), overlapping slightly, so they form a (more or less) square shape.
2. Spread an even layer of the ricotta mixture over the eggplant.
3. Layer the marinated veggies over the ricotta.
4. Spread an even layer of the tomato sauce over the veggies.
Repeat steps 1-4, until all of the eggplant is used - I ended up with about five layers. Cover the top layer with one more layer of eggplant, and spread a layer of tomato sauce over the eggplant.

The lasagna can be served immediately or set aside for an hour or so, to "rest".  The flavors will have a chance to meld and develop, and the vegetables will continue to release some water. The liquid can be carefully poured off before serving.
I prefer to let the lasagna rest, especially if I'm serving it to guests; this way the lasagna doesn't end up sitting in a puddle, after an hour on the dinner table.

It's also nice to save the vegetable liquid, if you're so inclined. I personally prefer not to throw away lovely, nutrient-rich vegetable juice. It can be added to a raw soup or salad dressing for a nice bit of flavor.


Enjoy!


1. Humor me?
2. And I just completely tipped my hand anyway.
3. Resulting in heavier foods.
4. And with nuts! Heh! Oh boy...
5. More green! So lovely.
Read more ...

15 February 2012

Grain Free Maple "Granola"

OK. So it's technically more of a crunchy coconut delight, loaded with Omega 3s and MCFAs.
It looks like granola.
It tastes like granola, without being quite as heavy.
It's not only Gluten Free, but Grain Free as well!

This granola would make a lovely topping for cobbler, streusel, muffins, or coffeecakes. I'd gobble it layered in a parfait, sprinkled over a breakfast pudding or fresh cut fruit.... The possibilities are endless.
Heck, it's even nice to snack on just as it is.


It's so simple to prepare and requires only four ingredients for the basic version. You can, of course, add in dried fruits, nuts, seeds, chocolate chips, whatever your little heart desires. That's part of the fun!

Coconut is the base ingredient1, but if you prefer lower fat foods, you don't have to pass this up (but you know those Medium Chain Fatty Acids are so good for you!). In fact, this batch is the lower fat version.
Reduced fat coconut makes for a much lighter granola, which I quite like; I typically find traditional granolas to be rather heavy.2  Feel free to use regular shredded coconut, though; the result will be a slightly more substantial/weightier granola.

With only a couple of modifications (don't worry, I'll include them!), this can be made raw.3
I'm pretty sure, I could make a no sugars version as well. I just haven't tried it yet. When I do I'll update the post :-)

Just a little caveat: When enjoying it as a breakfast cereal,4 it may begin to take on the consistency of a porridge, if left sitting in liquid too long.5 This is due to the flax rehydrating.


Grain Free Maple Granola
(serves 1-2)

  • 1 Cup (60g) Reduced Fat Shredded Coconut (I used Let's Do Organic)
  • 1/3 Cup (30g) Ground Flax Seed
  • 1/4 tsp Sea Salt
  • 1/2 tsp Ground Cinnamon (Optional)
  • 2 Tbsp (40g) Maple Syrup (feel free to sub Agave or Coconut Nectar)
  • 4 tsp Filtered Water
  • Coconut Oil - for oiling the baking sheet
Oven 275F/135C

Combine all dry ingredients, and mix well.
Add maple syrup and water, and stir/toss gently to coat the coconut/flax. 

Allow the granola to sit for 5-10 minutes. The flax will absorb the liquid and help create the granola clusters.

Spread the granola, in an even layer, onto a lightly greased baking sheet. Do this mindfully6, to avoid breaking up the clusters.

Bake in a preheated over for 30-40 minutes, or until the granola is dry and crisp.

Use/gobble as desired - perhaps toss in your favorite dried fruit.
It could be made more substantial by adding some sprouted buckwheat groats (prior to baking), and it would still be grain free!

To make this Raw:
  • Use regular dehydrated shredded coconut instead of the reduced fat coconut
  • Use Coconut Nectar instead of Maple syrup
Follow directions as above, except spread the granola onto a teflex dehydrator sheet, and dehydrate at 110F for 4-6 hours, or until thoroughly dehydrated and crisp. You can also gently rotate the mixture half way through, to ensure even dehydrating.
As above, feel free to toss in some dried fruit, cacao nibs, whatever your little heart desires. Soaked and sprouted buckwheat groats7 can also be added to this raw version - do so prior to dehydrating.

YUH-UM!
Raw version w/Sprouted Buckwheat & Raisins


1. Surprise!!!
2. In case you were wondering.
3. Oh boy. Is this becoming a trend?
4. With your fave non-dairy "milk" obviously :-)
5. Really though, any cereal will get soggy if left too long.

6. Uh... I guess that's my yogini brain talking.
7. I haven't posted a recipe/directions for soaking and sprouting buckwheat, as of the time of this post, but I could :-)
Read more ...

12 February 2012

Chocolate Covered Strawberry... Cookies? - V-Day "Double Header"

I will try to keep the rambling to a minimum, so we can (finally) get to the recipe(s) I keep promising to post.
I so wanted to post this yesterday, but the day got away from me. I then tried to post this morning, but I ran out of time before I had to head out to teach, then yoga, then yoga teacher training...

Uh... better late than never?1

So V-Day is soon approaching, and although, I'm not really one to get swept up in the "festivities", I thought I would step out of my box, and create a V-Day themed treat.

The idea that popped into my head was ridiculously simple - a classic V-Day sweet, but with a little twist. It's even simple enough to make with kiddos... Oh, and also I made TWO versions: a baked version and a raw food version.

Yep. Not only did I make a V-Day recipe, but I took it a (small) step further and made two. How's that for stepping out of my (heart-shaped2) box?
<<<-----Baked                         Raw----->>>

For the baked version, I simply used my basic shortbread recipe, topped with 100% fruit strawberry preserves, and homemade chocolate.

The raw version is a teensy bit more involved, but still surprisingly simple - you will need a dehydrator, though.  I was thinking about ingredients for a raw, nut free shortbread cookie; when it finally struck me, I thought it was so obvious, I could scarcely believe I'd had to stop and think... Coconut (obviously) and FLAX!

I layered the strawberry after the cookies were finished baking/dehydrating. However, feel free to spread the strawberry preserves on the cookies half way through baking/dehydrating to create a more solid strawberry layer.


So which one should go first?  Hmmm.... OK; Baked.

Chocolate Covered Strawberry Cookies
(makes 12-14)

  • 3/4 Cup (85g) Sorghum Flour
  • 1/4 Cup (30g) Tapioca Flour
  • 3 Tbsp (30g) Coconut Palm Sugar
  • 1 tsp Baking Powder (or DIY)
  • 1/4 tsp Sea Salt
  • 1 Chia Egg (1T ground chia + 3T filtered water)
  • 3 Tbsp (45g) Earth Balance Coconut Spread(softened)
  • 2 tsp Vanilla Extract
  • 100% fruit Strawberry Preserves
  • Easy Chocolate - see recipe below (you can also melt down 3/4 cup of Semisweet Chocolate Chips)
Oven 325F/160C

Prepare your chia egg, and set aside.

In a mixing bowl, thoroughly combine the first 5 dry ingredients.

Add the chia egg, earth balance and vanilla, and mix well. The dough should be smooth but somewhat stiff. Cover the bowl, and place it in the refrigerator to chill for 20-30 minutes.

While your dough is chilling, you can prepare your chocolate (or melt your chips using a double boiler):
Easy Chocolate*
(enough to top 12 average-sized cookies)
  • 1 1/2 Tbsp (20g) Extra Virgin Coconut Oil
  • 4 Tbsp (20g) Unsweetened Cocoa or Raw Cacao Powder
  • 2 Tbsp (40g) Raw Coconut Nectar or Agave (OR 20 drops of liquid stevia, and increase coconut oil to 2T)
  • Pinch Sea Salt
Gently warm coconut oil, until it becomes liquid (if it isn't already).
Stir in the sweetener and a pinch of salt. Then add the cocoa powder and stir until the sauce is smooth and even.

Remove half of your chilled dough from the fridge, and place between two sheets of parchment paper. If you prefer, you can also lightly dust a work surface (and rolling pin) with tapioca flour.
Using a rolling pin, roll out the dough to approx. 1/4" thickness.

Remove the top layer of parchment, and cut out the cookies, using a heart-shaped cookie cutter (or any shape you like, really). Peel away the excess dough, and roll it into a ball to re-use.

Repeat the process, until all of the dough has been used. While working, pop the dough in the fridge for a bit, if it gets too soft and sticky.

Carefully transfer the cookies to an ungreased baking sheet, and bake for 10-12 minutes or until lightly browned. Don't overbake. The cookies will continue to firm up as they cool.

Once the cookies are cooled, spread an even layer of strawberry preserves over the tops of the cookies, and then drizzle/spoon/pour your chocolate over the preserves.
Chill the cookiesin the fridge for a few minutes, to allow the chocolate to solidify.

Enjoy!


*Easy Chocolate can be used right away as a sauce, or spread onto parchment paper and chilled for a solid chocolate treat.
If drizzled over a yummy vegan frozen dessert, it will also solidify into a crisp chocolatey shell.

Aaaaaand.... here we go! Recipe #2:

RAW Chocolate Covered Strawberry Cookies
(makes 12)

For the cookies...
  • 1/2 Cup (40g) Shredded Coconut
  • 1/4 Cup (25g) Golden Flaxseeds (or 1/2 cup golden flax meal)
  • 1 small (100g) Apple (any variety you prefer; peeled) 
  • 1 1/2 Tbsp (30g) Coconut Nectar
  • 1 tsp Vanilla
  • 1/4 tsp Sea Salt
For the Raw Strawberry "Preserves"...
  • 2 Cups (200g) Strawberries
  • 1/4 Cup (40g) Dates 
  • 2 Tbsp (10g) Ground Chia
For the Easy Chocolate - prepare as above using Raw Food Options.

Dehydrator 110F/44C

In a mini blender, using the grinder blade, process the coconut and flax seeds together until they reach the consistency of a slightly coarse flour. A coffee mill will also work for this step.
Pour the mixture into a mixing bowl

Peel and chop the apple. Add the apple to food processor along with the coconut nectar, vanilla and salt, and puree until very smooth.

Add the apple puree to the "flour" mixture, and mix well. Let the batter sit for a few minutes to allow the flax to thicken it into more of a dough.

Shape your cookies onto the dehydrating sheet/teflex sheet  using this method:

Place a cookie cutter onto the dehydrator sheet, and spoon a small amount of dough into the cutter. The amount will depend on the size of your cookie cutter. You want enough to form 1/4" thick cookies.

Spread the dough evenly inside the cutter. You'll initially have to guestimate the thickness, but after two or three, it'll be a cinch.

Gently lift the cutter from the cookie, and repeat with the rest of the dough.
No need to be generous with the spacing; the cookies can be placed pretty close together, provided they're not touching.

Dehydrate for 8-12 hours. The cookies should be fairly firm, but still soft in the center and a bit tacky on the bottom.

Gently -  very gently - loosen the cookies from the sheet and turn them over. Transfer the cookies to a mesh dehydrator sheet (still top side down), and dehydrate for 8-12 more hours.
If you don't have a mesh sheet, they can be left on the teflex sheet or placed directly onto the dehydrator tray.

The cookies will be crisp outside and a bit soft inside; I like them that way, but if you prefer a crisper cookie, just dehydrate them for an extra couple of hours.3

Once your cookies are ready,  prepare the Raw Strawberry Preserves by combining strawberries, dates and ground chia in a food processor or high powered blender until smooth. Set the mixture aside to thicken, while you prepare the Easy (Raw) Chocolate.

Just like the baked cookies, spread an even layer of raw strawberry preserves over the top of the cookie, then drizzle/spoon/pour your chocolate over the preserves. Chill the cookies in the fridge for a few minutes, to allow the chocolate to solidify.

Enjoy!


I prefer the cookies with the "chocolate covered strawberry" on the top, although I did toy with a sandwich version, which was pretty good.
If that idea strikes your fancy, simply spread the strawberry and chocolate onto the bottom side of a baked cookie, and cover with another cookie - bottom side down - , so that the tops of the cookies are facing the world.
For the raw cookies, do the same thing, but make the sandwiches top side in.

Mmm-Mmmmmm....


1. Yes; that may be trite, but it sorta makes me feel better.
2. TWO references in one - much like this post.
3. Seriously though, you've already been waiting nearly 24 hours. I guess, at that point, two more hours won't matter, but I'd rather eat some cookies.
Read more ...

30 January 2012

3 Minute (Raw) Caramel Apples

Beauty is in the eye of the... blah blah blah.

Yeah. So, maybe these are not the prettiest caramel apples you've ever seen: the caramel isn't smooth, even and glossy; it doesn't pull away in strands when you bite into it; it doesn't stick to your teeth, face, or hair; it's not made of refined sugars... Wait... what was my point? That sounds much nicer, actually. Should I keep going?
It gets better.

They're vegan, free of refined sugars, gluten free, fat free, allergy free*, and still sticky, sweet and delicious!! Yes, indeed.
But wait! There's more!
These caramel apples are a completely raw, whole food, TWO ingredient treat that takes only THREE minutes to prepare. You seriously don't even need a recipe, but I'll provide a loose list of constituents and assembly instructions :-)


3 Minute Raw Caramel Apples
  • Organic Granny Smith Apples (any apple is fine; I like the pairing of less-sweet, tartness with the "caramel")
  • Organic Dates (3-4 per apple. Medjool or Deglet Noor1 are fine - the softer and gooier, the better)
  • Chopsticks/sturdy skewers (optional)
Wash and dry the apples.
Slice the dates lengthwise; remove pits, if necessary, and open the date to expose the gooey inside.
Rub the date over the apple, so that all the gooey goodness sticks to the apple - it probably won't be perfectly even and uniform, but that's OK!
Once your apple is coated to your liking, you can poke a chopstick (I find that Japanese style works best) or skewer into the bottom, or just slice it up the way it is.
Enjoy!!

*I rolled one apple in chopped, cinnamon-spiced pecans (raw pecan pieces; Nutiva Coconut Oil; cinnamon). Obviously, this is optional. If you can tolerate seeds, you could try the same idea by subbing pepitas.


If  your dates aren't very soft, you can try this (non-3 minute) method:

Soak the dates in a tiny bit of room temp filtered water (1 tsp per 3 dates) for a few minutes. Then puree the dates in a food processor, blender or mini blender, until a relatively smooth, but still thick paste forms.

Gently press/smooth the desired amount of date paste over each apple, and skewer or slice as above.
If using this method, and you want a bit denser consistency from your date caramel, allow the apple(s) to sit in the refrigerator uncovered for 1-2 hours (or even overnight).

The pureeing method also lends itself to some fun flavor ideas:
Salted Caramel Apple: Add a couple pinches of Sea Salt to your date puree. 
Cinnamon Caramel Apple:  Add approx. 1/4 tsp of ground cinnamon for every 4-5 dates.
Chocolate Caramel Apple: Add 1/2 tsp Raw Cacao Powder for every 4-5 dates

Date-licious!

1. Deglet Noors lend a more caramelly flavor (IMHO).
Read more ...

13 January 2012

Raw Chocolate Coconut Macaroons


Yes; another raw cookie post. They're just so quick and simple to prepare. Better still, they can be eaten like "cookie-dough" but without the potential tummy-ache.
If you indulged in heavier foods over the holidays, these macaroons can be a nice way to satisfy a little sweet tooth, without undoing any post-holiday eating changes or detoxes.

Although they're a raw food with natural sugars and healthy fats, it's still possible to overdo even healthy foods. So, I also intentionally made them into small, little bites.
I suppose I always make my cookies on the smaller-side, though.1 I just prefer a small taste of sweet treats. When I make them small, I don't end up leaving half-eaten treats around.2

Like the Banana Cacao Chip Cookies, these cuties are nut free. They are still coconut-based however, and although coconuts are a drupe, some individuals with nut allergies find that they react to coconut. If you're not sure, it's best to avoid coconut until you can safely determine how your body will process it.

I used dates as the binder and sweetener, which makes them a touch sweeter than the Banana Cacao Chip Cookies; however, the bitterness of the cacao powder balances out the sweetness. They really aren't as sweet as you might expect. I quite prefer them that way.
Once combined with the coconut, they transform4 into lovely, chewy, chocolatey bites, with a crisp outside, moist inside and the slightest hint of caramel.

Not bad for uncooked, unprocessed, real food, eh?


Dehydrating them produces a crisper outside and gives them more of a "macaroon" texture. Of course, if you don't have a dehydrator, they can be gobbled up as "macaroon dough" bites - they'll be something like a less-sweet coconut-date roll that's been supergastronomically enhanced by a radioantioxidative spider bite. 5

These really do look much better than a certain GF, chocolate donut fiasco from years back.
If you're interested in reducing the fat/calories, you can use the reduced fat shredded coconut I mentioned before, but they won't be 100% raw.

Chocolate Coconut Macaroons
(makes 6-8 Macaroons)
  • 1 Cup Shredded Coconut
  • 6-8 Pitted Dates (soaked for 2-3 hours in 3T of filtered water; for a sweeter macaroon, add a couple extra dates)
  • 1 tsp  Unrefined Virgin Coconut Oil (add an extra teaspoon, for a richer macaroon, or even omit completely, if you prefer.)
  • 1 heaping Tbsp  Raw Cacao Powder (you can also sub carob powder)
  • 1/2 tsp Vanilla Extract or seeds from 1/2 of a vanilla pod
  • Pinch of salt

In a food processor or high-powered blender, combine dates (including any remaining soaking water), coconut oil, vanilla and salt. Process until a smooth paste forms. Add the cacao powder and continue to blend, until well combined.

Add the date paste mixture to the shredded coconut and mix well. Your mixture should be the consistency of cookie dough -  stiff and sticky enough to form into a ball, but not too sticky.

Shape the macaroons by rolling pieces into 1" balls, and then create a flat bottom by pressing them down lightly onto a flat surface. Arrange the macaroons on a mesh dehydrator sheet, and dehydrate at 110F for 2-3 hours or until the outside reaches the desired level of crispness.
You can also opt to gobble them as they are.

Create a Fabulous Day!


1. I've actually been criticized for this by a certain angry bff.
2. That sort of makes me sound like a wild animal... or animalito, as I've been called. Honestly though, I'm far too much of an OCD/anal-retentive/clean-freak to leave anything (especially food) lying around my house.
3. Or gals, if you prefer.
4. Magically
5. Uh-oh... Dork Alert! Someone stop me!
    Read more ...

    06 January 2012

    Chia Cookie "Doh!" Pudding

    La Befana should have brought me some decisiveness today. Hmph.
    Although, she did leave some pretty nice weather, and I didn't find any coal in my shoes.

    Since she didn't drop off any of that aforementioned and much-needed decisiveness, I'm still wavering on whether or not to post a recent dessert recipe.  I'm really bad in that respect, and it puts a bit of a damper on any prolificacy. However, I'm pretty good at multi-tasking, if I do say so myself.1 So, while I'm wavering on that one, I will post this other, which is just as delicious but more nutrient-dense and much less involved2 to prepare.

    Hmmm.... seems like my indecisiveness is working out pretty well.

    (another) Breakfast that eats like dessert.
    Much like the Mexican "Hot" Chocolate Pudding, this is so, so, SO easy to prepare. It's raw, vegan, gluten, soy & nut free, and LOADED with fiber and healthy omega 3 fatty acids. Could it get better? Oh yeah, it also tastes like cookie dough.

    I gave my pudding a boost with half of a scoop of raw protein powder, but it's not necessary. Also, while the pudding is really quite delicious as is, you can make it a little more decadent (and more cookie dough-ish) by adding a bit of coconut oil; if you tolerate nuts, you could also try adding a tablespoon or two of raw cashew butter or soaked raw cashews.

    Chia Cookie-Dough Pudding
    (makes one serving)
    • 1 Cup (8 fl. oz) Homemade Raw Flax Milk (OR your favorite raw nut/coconut milk)
    • 3 scant Tbsp (28g) Chia Seeds
    • 2-3 Pitted Medjool Dates (best if they're soft and gooey; mmmmm...)
    • generous pinch of Sea Salt (don't omit, it really brings out the cookie dough flavor)
    • 1/2 tsp Vanilla or seeds from 1/4 of a vanilla pod
    • 1-2 tsp Raw Cacao Nibs
    • (Optional) 1/2 Scoop Raw Protein Powder (I like Garden of Life®)
    • (Optional) 1/2 tsp Virgin Coconut Oil

    Combine nut milk, dates, salt and vanilla (if you're using raw protein and/or coconut oil, add those as well) in a blender, and blend until smooth.

    Pour the mixture into a separate bowl or glass, and stir in the chia seeds. Keep mixing until the seeds begin to stay suspended in the mixture.

    Allow the mixture to sit for a minimum of 15-20 minutes (or overnight, if you prefer); the chia seeds will do their thing and thicken the pudding. Once your pudding is pudding-like, stir in the cacao nibs. That's it! Easy? You betcha.

    I don't know that I wanted to find her
    lurking over my shoes anyway.

    Image Source: Google Images
    If desired, garnish with an extra pinch of cacao nibs, and serve.3


    Create a Fa-befana-lous Day!


    1. I think the ADD actually helps in a weird way. Go figure.
    2. Super Easy/Simple/Uncomplicated 
    3. In a bowl.. I know today is La Befana and all, but this is probably not a treat you'd want to find in your shoe. Yes; much better served in a bowl.
    Read more ...

    02 January 2012

    My Lucky New Year's Foods (part 2): Easy Kale Guacamole Salad

    So, this is second part of my lucky New Year foods. Greens are one of the lucky New Year foods I mentioned in Part 1. Everything I've seen mentions cooked greens because of the way the folded leaves resemble money, but I'm really into this particular salad right now, and well.... greens are greens, right?


    The key to a more flavorful and tender salad is to massage1 the kale. This helps to break down the fiber and allow the avocado dressing to really incorporate and permeate the leaves.
    Even with the massage session, this salad is really quick and simple to make. If you're short on time and looking for a nutrient-dense and filling meal, this salad is for you.

    Easy Kale Guacamole Salad
    (serves 2-4)
    • 1 Bunch Curly Kale (Dinosaur/Lacinato is fine as well)
    • 2 Ripe Medium Avocados
    • 1/2 Medium Cucumber (preferably organic & unwaxed) 
    • 4 Campari Tomatoes (or 3 Roma/2 medium "globe" tomatoes)
    • 1/2 tsp Ground Cumin
    • 1/4 tsp Granulated Garlic
    • 1 tsp Fresh Lime Juice
    • Pinch of Cayenne (optional)
    • Sea Salt to taste
    • 1/4 Cup Filtered Water or So Delicious® Unsweetened Coconut Milk or your favorite raw nutmilk (you may want to avoid stronger-flavored milks like hazelnut)
    In a large bowl mash the avocado until smooth, then mix in the cumin, garlic, cayenne, lime juice and salt. Once mixed, add your liquid and mix until smooth.

    Rinse the kale and pat dry (or use a salad spinner). Remove the leafy parts from the tough stalk and chop into bite-sized pieces. Add the kale to the avocado mixture.

    Cut the cucumber in half, lengthwise. Take half; cut it in half, lengthwise again, and slice into approx. 1/4" slices. Do the same with the other half.
    Dice the tomato or chop into bite-sized pieces.

    Before adding your cukes and tomatoes to the other ingredients, get messy.2
    Yep. Smoosh your hands right into the kale-avocado mixture and massage that kale; really knead the avocado in, the way you would knead dough.

    Once you've worked the kinks out of your kale, add the remaining veggies and toss together until everything is fully coated with the avocado mixture. Add any additional salt or pepper to taste, serve and enjoy!

    Create a Fabulous Day New Year!

    1. Doesn't the kale deserve it? Being a nutritional powerhouse is hard work.
    2. Just make sure your hands are clean.
    Read more ...