
A couple of days ago, I posted a "Recipe Rewind", on CL's social media channels, to last year's Raw Caramel Apple recipe.
It is that time of year, after all.
The rewind/revisit sparked thoughts of the many other treats I could infuse with caramel-appley goodness. I actually sat down and made a list, each one of which I hope to be able to create and post here. For now though, I settled on the one that kept drawing my attention, and assuming you read the title of this entry before arriving at this point, there's no real surprise to be had.

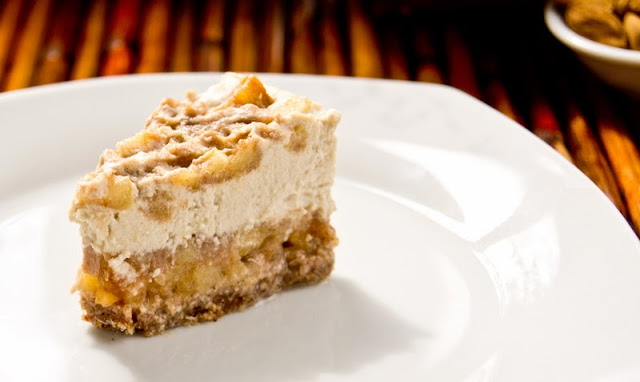
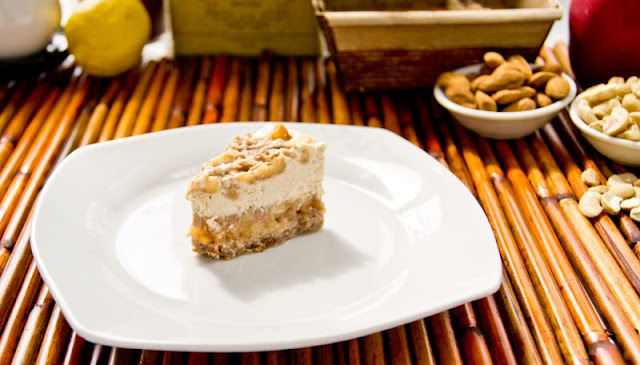
So, yes, I made a scrumptiously decadent Raw Caramel Apple Cheezecake. It is a nut-based dessert, but it is not heavy or dense. The caramel apple layer also lends to less-density. In fact, I specifically made this version so that the cheezecake filling would be slightly less firm. The result was light (and delicious) and not quite so rich, so was kind of easy to eat more than one might intend.1 I should have waited until Friday, because the BF sure would have loved it.2 Thankfully, I only made a mini, two-serving cake.
While, I prefer slightly softer cheezecakes, the recipe does include options for a firmer cake. The firmer option ups the fat content3 and probably the richness, so you might to not be tempted to eat as much.4 Calorically though, it's pretty much even.5
You can get pretty creative, in terms of pans for the two-serving cake. I used a mini-loaf mold. Other similarly-sized options are: a 4" ramekin,
Notes:
- When making a small/two-serving cake, I've found the mini-blender to be the most useful. If you don't have access to a mini blender, I'd suggest at least doubling the recipe; sometimes standard blenders have difficulties thoroughly blending small amounts of ingredients.
-The blending blade shaft can get quite hot, if used continuously for too long. This won't affect the final product at all, but it can get hot enough to begin to denature the enzymes of the food touching it, which could affect the "rawness" of the cake. One solution to this is to use the 'pulse' feature of your blender, until things are mostly blended and broken down, and then blend continuously to achieve the smooth/creamy consistency.
- For a "Full-sized" cheezecake (as opposed to Cucina Libera-sized), triple the recipe, and use a 7" springform pan.
- 2 teaspoons of coconut oil in the filling yields the less-firm CL cake. For a firmer cake, use 3-4 teaspoons of oil depending on preference. You could even add up to 5 teaspoons, if you prefer a denser, richer cake.
Important! Before you begin, make sure all ingredients are at room temp, so that when you add the coconut oil at various stages, it blends and emulsifies, instead of solidifying into little oily crystals throughout your mixture. Everything should be soaked at room temp, so this shouldn't be an issue, but just a little heads-up.
Raw Caramel Apple Cheezecake
(serves 2)
For the Caramel:
**Pre-soak Dates, in 1/2 Cup of filtered water, for 20-30 minutes to loosen the skin; carefully peel the dates and return them to the soaking water. Continue soaking for 8 hours or overnight.

1. Combine the dry ingredients for the crust in a clean, dry mini-blender or high-powered blender. Pulse until the almonds are well chopped and the mixture is the consistency of a coarse flour.
2. Add the dates and the coconut oil to the dry mixture and blend until the dates are chopped and the mixture begins to stick together in a sort-of "dough' ball.
3. Press the crust evenly into the bottom of your desired pan/mold. It should be approx. 1/4 inch thickness. Set aside while you prepare the caramel and the filling.
4. The dates should be soft and have formed a syrup. Leaving the dates behind, remove 2-4 Tbsp of the date syrup. Set the syrup aside.
5. Using a clean mini blender or a high-powered blender, blend the soaked dates (including any remaining liquid/syrup) sea salt, coconut oil, and vanilla (if using) until the mixture is smooth... you know, like caramel. Set the caramel aside.
6. Into a mini-blender, using the chopping attachment, or a high-powered blender, add the drained cashews, the syrup from step #1, lemon juice, vanilla, and 1 tablespoon of filtered water. Begin blending, adding as little water as necessary, one tablespoon at a time, to get the mixture to a smooth, creamy. Once the filling is blended and smooth, it's time to assemble.
7. Get your pan with the set crust. Directly on top of the crust, layer the chopped apples to about 1/2 to 2/3 inch thickness; keep some apples aside to top the cheezecake.
Spoon about 3/4 of the caramel over the apples, allowing it to mix in with the apples a bit and making sure it is spread evenly to the edges.
Pour/spoon all of the cashew filling over the apples, and spread it evenly to the edges of the pan/mold.
Use some/all of the remaining apples and caramel to garnish the top of your cheesecake.
8. Allow the cheezecake to set in the refrigerator for at least 2 hours before serving. A larger cake should be allowed to set from 4-8 hours. I know it's difficult to wait, but the time is important to allow the cake to set, firm, and for the flavours to develop and meld.
OR you can opt for what I did: I froze my little cake, and then allowed it to thaw in the fridge overnight. The texture and consistency turned out really well.
ENJOY!
1. It might be the healthier, raw-food version, but it's far from a low-calorie treat. Sorry :-(
2. Yeah, that would be "Sorry" #2
3. All good fats, of course.
4. In case you think that's a good thing.
5. Sorry to burst your bubble (if you were excited about endnote 4). I guess we're up to "Sorry" #3?
Read more ...
It is that time of year, after all.
The rewind/revisit sparked thoughts of the many other treats I could infuse with caramel-appley goodness. I actually sat down and made a list, each one of which I hope to be able to create and post here. For now though, I settled on the one that kept drawing my attention, and assuming you read the title of this entry before arriving at this point, there's no real surprise to be had.

So, yes, I made a scrumptiously decadent Raw Caramel Apple Cheezecake. It is a nut-based dessert, but it is not heavy or dense. The caramel apple layer also lends to less-density. In fact, I specifically made this version so that the cheezecake filling would be slightly less firm. The result was light (and delicious) and not quite so rich, so was kind of easy to eat more than one might intend.1 I should have waited until Friday, because the BF sure would have loved it.2 Thankfully, I only made a mini, two-serving cake.
While, I prefer slightly softer cheezecakes, the recipe does include options for a firmer cake. The firmer option ups the fat content3 and probably the richness, so you might to not be tempted to eat as much.4 Calorically though, it's pretty much even.5
You can get pretty creative, in terms of pans for the two-serving cake. I used a mini-loaf mold. Other similarly-sized options are: a 4" ramekin,

Notes:
- When making a small/two-serving cake, I've found the mini-blender to be the most useful. If you don't have access to a mini blender, I'd suggest at least doubling the recipe; sometimes standard blenders have difficulties thoroughly blending small amounts of ingredients.
-The blending blade shaft can get quite hot, if used continuously for too long. This won't affect the final product at all, but it can get hot enough to begin to denature the enzymes of the food touching it, which could affect the "rawness" of the cake. One solution to this is to use the 'pulse' feature of your blender, until things are mostly blended and broken down, and then blend continuously to achieve the smooth/creamy consistency.
- For a "Full-sized" cheezecake (as opposed to Cucina Libera-sized), triple the recipe, and use a 7" springform pan.
- 2 teaspoons of coconut oil in the filling yields the less-firm CL cake. For a firmer cake, use 3-4 teaspoons of oil depending on preference. You could even add up to 5 teaspoons, if you prefer a denser, richer cake.
Important! Before you begin, make sure all ingredients are at room temp, so that when you add the coconut oil at various stages, it blends and emulsifies, instead of solidifying into little oily crystals throughout your mixture. Everything should be soaked at room temp, so this shouldn't be an issue, but just a little heads-up.

Raw Caramel Apple Cheezecake
(serves 2)
For the Caramel:
- 8-9 Medium Pitted Dates (I used Deglet Noor; soaked overnight**)
- Pinch of Sea Salt
- Scant 1/2 tsp Virgin Coconut Oil
- Dash of Vanilla Extract or few Vanilla Seeds (optional)
- 3/4 Cup (85g) Raw Cashew Pieces (weighed prior to soaking; soaked overnight*)
- 2-4 Tbsp Date Syrup (from the soaked dates; see below)
- 1/2 Cup Diced Apple
- 1/4 Cup Filtered Water
- 2-4 tsp (9-19g) Virgin Coconut Oil (warmed gently to liquid)
- 1 Tbsp Lemon Juice
- 1/2 tsp Vanilla Extract OR seeds from 1/3 Vanilla Pod
- 1/8 Cup (14g) Raw Almonds (I used sprouted almonds)
- 3 Tbsp (14g) Sprouted Buckwheat Groats OR 3 Tbsp (14g) Shredded Coconut OR 2 Tbsp (14g) Raw (GF) Oat Groats
- 1/4 tsp Ground Cinnamon
- Generous pinch of Sea Salt
- 1-3 Medium Dates (depending on how sweet you prefer your crust)
- 1/2 tsp Virgin Coconut Oil
**Pre-soak Dates, in 1/2 Cup of filtered water, for 20-30 minutes to loosen the skin; carefully peel the dates and return them to the soaking water. Continue soaking for 8 hours or overnight.

1. Combine the dry ingredients for the crust in a clean, dry mini-blender or high-powered blender. Pulse until the almonds are well chopped and the mixture is the consistency of a coarse flour.
2. Add the dates and the coconut oil to the dry mixture and blend until the dates are chopped and the mixture begins to stick together in a sort-of "dough' ball.
3. Press the crust evenly into the bottom of your desired pan/mold. It should be approx. 1/4 inch thickness. Set aside while you prepare the caramel and the filling.
4. The dates should be soft and have formed a syrup. Leaving the dates behind, remove 2-4 Tbsp of the date syrup. Set the syrup aside.
5. Using a clean mini blender or a high-powered blender, blend the soaked dates (including any remaining liquid/syrup) sea salt, coconut oil, and vanilla (if using) until the mixture is smooth... you know, like caramel. Set the caramel aside.
6. Into a mini-blender, using the chopping attachment, or a high-powered blender, add the drained cashews, the syrup from step #1, lemon juice, vanilla, and 1 tablespoon of filtered water. Begin blending, adding as little water as necessary, one tablespoon at a time, to get the mixture to a smooth, creamy. Once the filling is blended and smooth, it's time to assemble.
7. Get your pan with the set crust. Directly on top of the crust, layer the chopped apples to about 1/2 to 2/3 inch thickness; keep some apples aside to top the cheezecake.
Spoon about 3/4 of the caramel over the apples, allowing it to mix in with the apples a bit and making sure it is spread evenly to the edges.
Pour/spoon all of the cashew filling over the apples, and spread it evenly to the edges of the pan/mold.
Use some/all of the remaining apples and caramel to garnish the top of your cheesecake.
8. Allow the cheezecake to set in the refrigerator for at least 2 hours before serving. A larger cake should be allowed to set from 4-8 hours. I know it's difficult to wait, but the time is important to allow the cake to set, firm, and for the flavours to develop and meld.
OR you can opt for what I did: I froze my little cake, and then allowed it to thaw in the fridge overnight. The texture and consistency turned out really well.
ENJOY!
1. It might be the healthier, raw-food version, but it's far from a low-calorie treat. Sorry :-(
2. Yeah, that would be "Sorry" #2
3. All good fats, of course.
4. In case you think that's a good thing.
5. Sorry to burst your bubble (if you were excited about endnote 4). I guess we're up to "Sorry" #3?


