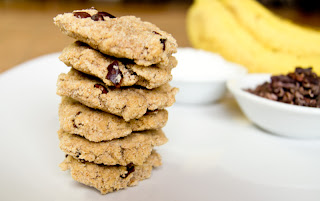
30 January 2012

3 Minute (Raw) Caramel Apples

Beauty is in the eye of the... blah blah blah.

Yeah. So, maybe these are not the prettiest caramel apples you've ever seen: the caramel isn't smooth, even and glossy; it doesn't pull away in strands when you bite into it; it doesn't stick to your teeth, face, or hair; it's not made of refined sugars... Wait... what was my point? That sounds much nicer, actually. Should I keep going?
It gets better.

They're vegan, free of refined sugars, gluten free, fat free, allergy free*, and still sticky, sweet and delicious!! Yes, indeed.
But wait! There's more!
These caramel apples are a completely raw, whole food, TWO ingredient treat that takes only THREE minutes to prepare. You seriously don't even need a recipe, but I'll provide a loose list of constituents and assembly instructions :-)


3 Minute Raw Caramel Apples
  • Organic Granny Smith Apples (any apple is fine; I like the pairing of less-sweet, tartness with the "caramel")
  • Organic Dates (3-4 per apple. Medjool or Deglet Noor1 are fine - the softer and gooier, the better)
  • Chopsticks/sturdy skewers (optional)
Wash and dry the apples.
Slice the dates lengthwise; remove pits, if necessary, and open the date to expose the gooey inside.
Rub the date over the apple, so that all the gooey goodness sticks to the apple - it probably won't be perfectly even and uniform, but that's OK!
Once your apple is coated to your liking, you can poke a chopstick (I find that Japanese style works best) or skewer into the bottom, or just slice it up the way it is.
Enjoy!!

*I rolled one apple in chopped, cinnamon-spiced pecans (raw pecan pieces; Nutiva Coconut Oil; cinnamon). Obviously, this is optional. If you can tolerate seeds, you could try the same idea by subbing pepitas.


If  your dates aren't very soft, you can try this (non-3 minute) method:

Soak the dates in a tiny bit of room temp filtered water (1 tsp per 3 dates) for a few minutes. Then puree the dates in a food processor, blender or mini blender, until a relatively smooth, but still thick paste forms.

Gently press/smooth the desired amount of date paste over each apple, and skewer or slice as above.
If using this method, and you want a bit denser consistency from your date caramel, allow the apple(s) to sit in the refrigerator uncovered for 1-2 hours (or even overnight).

The pureeing method also lends itself to some fun flavor ideas:
Salted Caramel Apple: Add a couple pinches of Sea Salt to your date puree. 
Cinnamon Caramel Apple:  Add approx. 1/4 tsp of ground cinnamon for every 4-5 dates.
Chocolate Caramel Apple: Add 1/2 tsp Raw Cacao Powder for every 4-5 dates

Date-licious!

1. Deglet Noors lend a more caramelly flavor (IMHO).
Read more ...

27 January 2012

Biscotti Arrabbiati allo Zenzero (Spicy Ginger Cookies)

I recently had a very specific request for a ginger molasses cookie.
I'm not kidding when I say very specific.

My (boy) bff will almost always happily eat anything I make. However, it's rarely without some commentary1 or inquisition, neither of which could be described as "gentle":
  • "These cookies are too small."
  • "These cookies are too soft."
  • "These cupcakes aren't sweet enough."
  • "What's in these??"
  • "What's that flavor??"
It's really more in the delivery of the criticism, than the criticism itself. I just can't quite accurately convey it in writing.

In all fairness, we have been friends for 14 years. He's very much like a brother, so we speak very frankly to one another. He's also developed something of a food paranoia2 after going through an OSHA training at work.

He is vegan. He does consume gluten, soy, cane sugar, etc... (none of which, you will find in these biscotti!). He knows that whatever I make for him is going to be Cucina Libera-ted,3 but he's fine with it (or... erm... see above).  
Despite complaining, he continues to taste-test4 most of my recipes. I quite like feedback (see above) from a more conventional and particular eater. It's helpful.5

So, when he requested ginger molasses cookies, I felt I should make them to his specifications: bigger, sweeter, crisper.
It's nice to make others happy.6

In that same vein ("niceness"), I always post recipes that cater (primarily) to my tastebuds. I thought it would be fun (and nice) to share one that caters more to someone else's, while still being unrefined and healthy(ier).

In his honor, I've decided to call them Biscotti Arrabbiati allo Zenzero.

Biscotti = Cookies; yes, I know they're not twice-baked, but that's the closest term we have for "cookies". If the term "arrabbiati" seems familiar, perhaps it's because you're familiar with Pasta all'Arrabbiata - pasta (typically penne) with a spicy red sauce. Arrabbiata indicates that it's spicy, which of course can easily apply to ginger. However, the word arrabbiato/a literally means angry, which can easily apply to my bff.7
I thought it was perfectly fitting... and rather clever, if I do say so myself.


 Biscotti Arrabbiati allo Zenzero
 (makes 12** )
  • 1 Cup (130g) All Purpose Gluten Free Flour (I use my own blend) 
  • 2 Tbsp (15g) Buckwheat Flour 
  • 1 tsp Baking Powder (or DIY
  • 1 tsp Ginger - ground or freshly grated (fresh will be spicier) 
  • 1/4 tsp Ground Cloves 
  • 1/4 tsp Ground Cinnamon 
  • 1/4 tsp Sea Salt 
  • 1 Tbsp (10g) Coconut Sugar 
  • 2 Tbsp (50g) Unsulphured Molasses
  • 1/2 Chia Egg (1/2T ground Chia + 1 1/2T filtered water) 
  • 3 Tbsp (45g) Earth Balance Coconut Spread
  • 1 Tbsp Filtered Water (or non-dairy milk)  
  • Ginger-Coconut Sugar (for topping - Optional)

Oven 325F/160C

Lightly grease a cookie sheet with coconut oil or palm shortening.
Prepare the chia egg, and set aside.

In a separate mixing bowl, combine the flour, baking powder, coconut sugar, salt and spices. Mix well.

Add the chia egg, molasses, Earth Balance and water. Mix until all ingredients are well-combined and a smooth, even dough forms. The dough should be fairly stiff.

Form the dough into 2" balls; then press the ball flat between your palms. Gently lay the dough disc (it's not a biscotto yet!) into a mixture of 3 parts coconut sugar, 1 part ground ginger (adjust as desired), and place on to the cookie sheet with the sugar side up.

Bake for 20-25 minutes for crisper cookies
     OR   12-15 minutes for softer cookies

 **This recipe yields approximately 2 Dozen Cucina Libera-sized cookies. Simply roll into 1" balls, and bake for slightly less time.

If you don't mind cane sugar, you can toss in some chopped crystalized ginger; you'll get an extra spicy kick and a nice bit of additional texture.

Delicious!


1. Feedback/brutal honesty/complaining
2. Hmph. It's great to practice food safety, but sometimes it gets out of control.

3. Clever or Maximum Dork? You decide.
4. "Scarf" down.

5. Truly.  Tastebuds that tend to want sweet, fat, gluten-ey, over-frosted can still like unprocessed, unrefined, less-sweet, GF... creations. I must be getting something right... right?

6. Even if they don't always show it. 
7. I say that with affection; uh... ok... sometimes.
Read more ...

20 January 2012

Coconut Muffins (+ Sugar Free Option!)

Given my predilection for a certain tropical drupe, I can scarcely believe it hasn't been the star of one of my baked muffin recipes.

I've quickly remedied that grievous oversight.

Moist, buttery Coconut Muffins
It's also quite nice to shift my attention to tropical items, given the monster snowstorm pummeling the streets right now. I can crank up the heat in my apartment, and imagine I'm somewhere sun-kissed and balmy.


The BF, who is a huge fan of the Pumpkin Spice Muffins, declared that these were the best muffins I've ever made :-)

There is so much coconut (flour, oil, nectar, flakes... !!!) in these muffins, it's nuts.1 Lots of coconut and no gluten, no soy, no corn, no scary ingredients -  just healthy, coconutty goodness (Vegan, coconutty goodness, of course). Mmmmm... the result is a moist and buttery (it's all the coconut!) muffin, with just the right kiss of sweetness.2

They made my apartment smell so very lovely as well :-) 3

You can sub Stevia to make them completely sugar-free; I liked it, but some others didn't share my enthusiasm.
Enjoy with a coconut milk hot cocoa, or pair them with a coconut/pineapple/banana-based smoothie4, and pretend you're on a tropical island.

A tropical island... with muffins.5


Coconut Muffins
(makes 6)
  • 1/2 Cup (70g) Sorghum Flour
  • 1/4 Cup (30g) Tapioca Starch
  • 2 Tbsp (15g) Potato Starch
  • 2 Tbsp (15g) Coconut Flour
  • 1/4 Cup (15g) Coconut Flakes
  • 1 tsp Baking Powder (or make your own)
  • 1/8 tsp Sea Salt
  • 1 Chia Egg (1T ground chia + 3T filtered water)
  • 2 Tbsp (40g) Coconut Nectar or 25-30 Drops Liquid Stevia (if you prefer a sweeter muffin, add an extra Tbsp of Coconut Nectar or a few extra drops of Stevia.)
  • 2 Tbsp (30g) Coconut Oil
  • 1 1/2 tsp (8g) Olive Oil
  • 1/2 Cup So Delicious Unsweetened Coconut Milk
  • 1/2 tsp Apple Cider (or Coconut!) Vinegar
  • 1/2 tsp Vanilla Extract
  • 1/2 tsp Almond Extract (Optional)

Oven 350F/180C

Lightly grease or line a 6 cup muffin tin.

Prepare your chia egg, and set aside.

In a mixing bowl, combine the first 7 dry ingredients.
In a separate small bowl or glass, mix together the coconut milk, coconut nectar, vinegar and extract(s). Stir until well-combined and the mixture begins to coagulate.

Add the coconut milk mixture to the dry ingredients, along with the coconut oil and olive oil. Mix until the batter is smooth and uniformly combined.

Spoon the batter into the muffin cups, filling them close to full - not overfull though. If desired, sprinkle the tops with some toasted coconut, or do what I did for a sweet/crunchy/coconutty topping:
Combine toasted coconut with a bit of coconut oil, a spoonful of coconut nectar, a dash of vanilla and a pinch of salt. Mix well, and spoon gently over the tops of the muffins before baking (or midway through).
Uh... can you say YUM?

Bake the muffins for 17-20 minutes, or until a toothpick inserted in the center comes out clean.


 Create a Fabulous Day!


1. COCO-nuts
2. For my tastes; you may have noticed, I tend towards the slightly-less-sweet side. 
3. Sorry, Nag Champa; you're really nice and all, but you're no coconut.
4. Green ones are even better!
5. It could totally happen
Read more ...

16 January 2012

Mini Baked Donuts

Dunkin' Donuts has a special place in my heart... for one very important reason. But also, and although I probably shouldn't, I adore a large hot cup of their decaf coffee (black, naturally).

Sure, I wish their decaf was SWP. I wish they didn't use styrofoam cups. Although, 100% of their espresso is Fair Trade, which is more than can be said for one rather ubiquitous corporate coffee overlord.
Regardless, DD is neither vegan nor gluten-free friendly** - maybe the hash browns, if you trust them and don't care about suspect ingredients; some bagels perhaps, for gluten-eating vegans who don't care about suspect ingredients; donuts are entirely a no-go.
**As of early 2013, I understand that DD does now offer some gluten free items; they are, however, still not vegan.

What's a conscious, gluten-free vegan to do? Uh.... well... make your own, of course.

Vegan, Gluten-Free Cake Donuts?!  Indeed.
I adapted this recipe from Gluten Free Goddess (who also shared a DD story; neato!!). I love that they're slightly sweet, but I wanted to do without the brown sugar, xanthan gum, rice flour and nut flour.
I went to my laboratory, made a few tweaks, and these moist, cake-y gems turned out beautifully. I used the same mini donut pan GFG used; although, it's non-stick (!!), so I've been in the market for a new one.1
I actually halved the recipe in testing but, even with the same pan, still ended up with 12 donuts; must've been the tweaks. Eh. Fewer ingredients to make 12 donuts... sure; it's straight economics.
The tweaks also gave these donuts an extended "life span";translation: they don't become stiff, dense and dry the next day, as is the wont of many2 gluten-free baked goods.


I cinnamon-glazed a few, and sprinkled the others with powdered coconut sugar and cinnamon. We didn't enjoy this batch with a DD coffee, but they were really good with the Caffè Kimbo we brought home from Italy.

Mini Baked (GF, Vegan) Donuts (adapted from Gluten Free Goddess)
(makes 12 mini donuts)
  • 3/4 Cup (88g) Sorghum Flour
  • 1/4 Cup (30g) Tapioca Flour
  • 2 Tbsp (15g) Potato Starch
  • 1 Tbsp (7g) Coconut Flour
  • 1/2 tsp Baking Powder (or make your own)
  • 1/4 tsp Baking Soda
  • 2 Tbsp (25g) Coconut Sugar
  • 1 tsp (5g) Blackstrap Molasses
  • 1/2 tsp Ground Nutmeg
  • 1/4 tsp Ground Cinnamon
  • 1/4 tsp Sea Salt
  • 2 Tbsp (30g) Earth Balance Coconut Spread (or sub any vegan, un-hydrogenated shortening)
  • 1 Chia Egg (1T Ground Chia + 3T filtered water)
  • 1/2 Cup So Delicious Unsweetened Coconut Milk
  • 2 tsp Vinegar ( I use Bragg's)
  • 1/2 tsp Vanilla
Oven 350F/180C

In a small bowl or glass, prepare the chia egg, and set aside.

In a large mixing bowl, combine the coconut sugar and molasses. Mix until the sugar is more or less the consistency of brown sugar (you just made your own, again!). Add all of the remaining dry ingredients and whisk together, until well-combined.

Add the buttery spread to the dry ingredients, and use a pastry cutter or fork to blend in, until it is evenly distributed and the mixture is crumbly.

In a separate glass or bowl, combine the coconut milk and vinegar and stir well. The coconut milk should start to coagulate. Then add the coconut milk mixture, chia egg and vanilla to the flour mixture.

Mix well until a smooth dough forms. It should be able to easily hold its shape when rolled, without sticking all over your hands.
Separate the dough into 12 even pieces, and very gently roll each piece into a 4-5 inch log. Gently place the dough into the well of the donut pan, and lightly smooth the ends together - you can also do this step separately and with lightly oiled fingers, after all of the donuts have been placed; I was just lazy/eager to pop them in the oven.

Bake for 12-15 minutes, until the donuts are firm to the touch.

Once the donuts have cooled slightly, glaze them, powder them, or eat them nude.3 They're delicious with a hot beverage.4


Enjoy!


1. If anyone has any good non-non-stick/non-scary-material recommendations, that would totally rule!
2. Not mine... well, not the majority of mine. Really! I think I've really perfected my flour blend and ratios. You can always try out recipe to test out my claims :-)
3. Cheeky! I meant unadorned, but hey, whatever floats your boat. 
4. Just be really careful, if enjoying them as possibly interpreted above.
Read more ...

13 January 2012

Raw Chocolate Coconut Macaroons


Yes; another raw cookie post. They're just so quick and simple to prepare. Better still, they can be eaten like "cookie-dough" but without the potential tummy-ache.
If you indulged in heavier foods over the holidays, these macaroons can be a nice way to satisfy a little sweet tooth, without undoing any post-holiday eating changes or detoxes.

Although they're a raw food with natural sugars and healthy fats, it's still possible to overdo even healthy foods. So, I also intentionally made them into small, little bites.
I suppose I always make my cookies on the smaller-side, though.1 I just prefer a small taste of sweet treats. When I make them small, I don't end up leaving half-eaten treats around.2

Like the Banana Cacao Chip Cookies, these cuties are nut free. They are still coconut-based however, and although coconuts are a drupe, some individuals with nut allergies find that they react to coconut. If you're not sure, it's best to avoid coconut until you can safely determine how your body will process it.

I used dates as the binder and sweetener, which makes them a touch sweeter than the Banana Cacao Chip Cookies; however, the bitterness of the cacao powder balances out the sweetness. They really aren't as sweet as you might expect. I quite prefer them that way.
Once combined with the coconut, they transform4 into lovely, chewy, chocolatey bites, with a crisp outside, moist inside and the slightest hint of caramel.

Not bad for uncooked, unprocessed, real food, eh?


Dehydrating them produces a crisper outside and gives them more of a "macaroon" texture. Of course, if you don't have a dehydrator, they can be gobbled up as "macaroon dough" bites - they'll be something like a less-sweet coconut-date roll that's been supergastronomically enhanced by a radioantioxidative spider bite. 5

These really do look much better than a certain GF, chocolate donut fiasco from years back.
If you're interested in reducing the fat/calories, you can use the reduced fat shredded coconut I mentioned before, but they won't be 100% raw.

Chocolate Coconut Macaroons
(makes 6-8 Macaroons)
  • 1 Cup Shredded Coconut
  • 6-8 Pitted Dates (soaked for 2-3 hours in 3T of filtered water; for a sweeter macaroon, add a couple extra dates)
  • 1 tsp  Unrefined Virgin Coconut Oil (add an extra teaspoon, for a richer macaroon, or even omit completely, if you prefer.)
  • 1 heaping Tbsp  Raw Cacao Powder (you can also sub carob powder)
  • 1/2 tsp Vanilla Extract or seeds from 1/2 of a vanilla pod
  • Pinch of salt

In a food processor or high-powered blender, combine dates (including any remaining soaking water), coconut oil, vanilla and salt. Process until a smooth paste forms. Add the cacao powder and continue to blend, until well combined.

Add the date paste mixture to the shredded coconut and mix well. Your mixture should be the consistency of cookie dough -  stiff and sticky enough to form into a ball, but not too sticky.

Shape the macaroons by rolling pieces into 1" balls, and then create a flat bottom by pressing them down lightly onto a flat surface. Arrange the macaroons on a mesh dehydrator sheet, and dehydrate at 110F for 2-3 hours or until the outside reaches the desired level of crispness.
You can also opt to gobble them as they are.

Create a Fabulous Day!


1. I've actually been criticized for this by a certain angry bff.
2. That sort of makes me sound like a wild animal... or animalito, as I've been called. Honestly though, I'm far too much of an OCD/anal-retentive/clean-freak to leave anything (especially food) lying around my house.
3. Or gals, if you prefer.
4. Magically
5. Uh-oh... Dork Alert! Someone stop me!
    Read more ...

    09 January 2012

    Banana Cacao Chip Cookies... or Cookie Dough Bites (High Raw & Nut-Free!)

    I wanted to make a raw cookie that contains no nuts and isn't too heavy. I have some dehydrated, sprouted buckwheat in the cabinet, but I suspected it would lend too strong of a flavor, so I turned to my favorite go-to ingredient.... coconut.

     I'm not intending to imply that I'm some sort of innovator here.1 Maybe it's just that I can't stay away from coconut. I need to be careful about that, lest I give myself some sort of allergy - OH the horror!! But I digress.

    Of course, a coconut-based cookie could be just as heavy as a nut-based cookie, so I made a little tweak. I used banana as the binder, and then went one step further; instead of using regular shredded coconut, I chose a reduced fat shredded coconut from Let's Do... Organic.
    LDO reduces the fat using a steam method, so although it's not unpleasantly processed, the coconut is no longer raw.2

    The result of using the reduced-fat coconut is a much lighter (and obviously lower-fat) cookie that dehydrates into perfectly crisp outside with a chewy inside -  the perfect cookie consistency, IMHO.
    If you prefer a 100% raw cookie, use regular (un-reduced fat) dehydrated, shredded coconut. The cookies will be denser and richer.3


    Banana Cacao Chip Cookies
    (makes 6-8 cookies)

    • 1 Cup Shredded Coconut
    • 1 (120g)Large Banana (mashed)
    • 1 tsp Vanilla Extract or seeds from 1/2 Vanilla Pod
    • 1 tsp Coconut Nectar
    • 1/8 tsp Sea Salt
    • 1 Tbsp Cacao Nibs

    In a blender (or mini-blender using the grinder attachment), process the coconut flakes into a crumbly paste. It should turn out almost like a coconut flour, but not quite. The goal is to pulverize the little coconut pieces into a fine powder.
    If you're using regular coconut, it will turn out more like coconut butter; just try to get the mixture more on the crumbly-paste side.

    Once your coconut is processed, add the mashed banana, vanilla, coconut nectar and salt. You can continue to use the blender, or just mash/mix the ingredients together with a fork. Your cookie dough should look like... well... cookie dough.
    Stir in the cacao nibs, until they're evenly distributed.


    Here is where you get to make a fun decision.4

    #1. Roll the cookie dough into 1" balls*. Flatten them into a cookie-shape approx. 1/4" thick. Arrange the cookies on a mesh dehydrator sheet, and dehydrate at 110F for 2-4 hours.  If using regular coconut, increase the dehydrating time until your cookies reach the desired "crispness".


    #2. If you don't have access to a dehydrator, or just really like cookie dough, you can roll the dough into little cookie dough bites, chill them in the fridge for 5-10 minutes and scarf down enjoy!


    Create a Fabulous Day!


    1. Didn't we go through this with the Raw Nut-Free Chili?... Whoa, deja vu.
    2. Having been exposed to steam-high temps and all. 
    3. I started to write "oilier", but that sounded gross and not quite accurately descriptive. I think it's more apt to say:  a more noticeable fat content.
    4. Just like Choose Your Own Adventure books! I used to love those. 
    Read more ...

    06 January 2012

    Chia Cookie "Doh!" Pudding

    La Befana should have brought me some decisiveness today. Hmph.
    Although, she did leave some pretty nice weather, and I didn't find any coal in my shoes.

    Since she didn't drop off any of that aforementioned and much-needed decisiveness, I'm still wavering on whether or not to post a recent dessert recipe.  I'm really bad in that respect, and it puts a bit of a damper on any prolificacy. However, I'm pretty good at multi-tasking, if I do say so myself.1 So, while I'm wavering on that one, I will post this other, which is just as delicious but more nutrient-dense and much less involved2 to prepare.

    Hmmm.... seems like my indecisiveness is working out pretty well.

    (another) Breakfast that eats like dessert.
    Much like the Mexican "Hot" Chocolate Pudding, this is so, so, SO easy to prepare. It's raw, vegan, gluten, soy & nut free, and LOADED with fiber and healthy omega 3 fatty acids. Could it get better? Oh yeah, it also tastes like cookie dough.

    I gave my pudding a boost with half of a scoop of raw protein powder, but it's not necessary. Also, while the pudding is really quite delicious as is, you can make it a little more decadent (and more cookie dough-ish) by adding a bit of coconut oil; if you tolerate nuts, you could also try adding a tablespoon or two of raw cashew butter or soaked raw cashews.

    Chia Cookie-Dough Pudding
    (makes one serving)
    • 1 Cup (8 fl. oz) Homemade Raw Flax Milk (OR your favorite raw nut/coconut milk)
    • 3 scant Tbsp (28g) Chia Seeds
    • 2-3 Pitted Medjool Dates (best if they're soft and gooey; mmmmm...)
    • generous pinch of Sea Salt (don't omit, it really brings out the cookie dough flavor)
    • 1/2 tsp Vanilla or seeds from 1/4 of a vanilla pod
    • 1-2 tsp Raw Cacao Nibs
    • (Optional) 1/2 Scoop Raw Protein Powder (I like Garden of Life®)
    • (Optional) 1/2 tsp Virgin Coconut Oil

    Combine nut milk, dates, salt and vanilla (if you're using raw protein and/or coconut oil, add those as well) in a blender, and blend until smooth.

    Pour the mixture into a separate bowl or glass, and stir in the chia seeds. Keep mixing until the seeds begin to stay suspended in the mixture.

    Allow the mixture to sit for a minimum of 15-20 minutes (or overnight, if you prefer); the chia seeds will do their thing and thicken the pudding. Once your pudding is pudding-like, stir in the cacao nibs. That's it! Easy? You betcha.

    I don't know that I wanted to find her
    lurking over my shoes anyway.

    Image Source: Google Images
    If desired, garnish with an extra pinch of cacao nibs, and serve.3


    Create a Fa-befana-lous Day!


    1. I think the ADD actually helps in a weird way. Go figure.
    2. Super Easy/Simple/Uncomplicated 
    3. In a bowl.. I know today is La Befana and all, but this is probably not a treat you'd want to find in your shoe. Yes; much better served in a bowl.
    Read more ...

    02 January 2012

    My Lucky New Year's Foods (part 2): Easy Kale Guacamole Salad

    So, this is second part of my lucky New Year foods. Greens are one of the lucky New Year foods I mentioned in Part 1. Everything I've seen mentions cooked greens because of the way the folded leaves resemble money, but I'm really into this particular salad right now, and well.... greens are greens, right?


    The key to a more flavorful and tender salad is to massage1 the kale. This helps to break down the fiber and allow the avocado dressing to really incorporate and permeate the leaves.
    Even with the massage session, this salad is really quick and simple to make. If you're short on time and looking for a nutrient-dense and filling meal, this salad is for you.

    Easy Kale Guacamole Salad
    (serves 2-4)
    • 1 Bunch Curly Kale (Dinosaur/Lacinato is fine as well)
    • 2 Ripe Medium Avocados
    • 1/2 Medium Cucumber (preferably organic & unwaxed) 
    • 4 Campari Tomatoes (or 3 Roma/2 medium "globe" tomatoes)
    • 1/2 tsp Ground Cumin
    • 1/4 tsp Granulated Garlic
    • 1 tsp Fresh Lime Juice
    • Pinch of Cayenne (optional)
    • Sea Salt to taste
    • 1/4 Cup Filtered Water or So Delicious® Unsweetened Coconut Milk or your favorite raw nutmilk (you may want to avoid stronger-flavored milks like hazelnut)
    In a large bowl mash the avocado until smooth, then mix in the cumin, garlic, cayenne, lime juice and salt. Once mixed, add your liquid and mix until smooth.

    Rinse the kale and pat dry (or use a salad spinner). Remove the leafy parts from the tough stalk and chop into bite-sized pieces. Add the kale to the avocado mixture.

    Cut the cucumber in half, lengthwise. Take half; cut it in half, lengthwise again, and slice into approx. 1/4" slices. Do the same with the other half.
    Dice the tomato or chop into bite-sized pieces.

    Before adding your cukes and tomatoes to the other ingredients, get messy.2
    Yep. Smoosh your hands right into the kale-avocado mixture and massage that kale; really knead the avocado in, the way you would knead dough.

    Once you've worked the kinks out of your kale, add the remaining veggies and toss together until everything is fully coated with the avocado mixture. Add any additional salt or pepper to taste, serve and enjoy!

    Create a Fabulous Day New Year!

    1. Doesn't the kale deserve it? Being a nutritional powerhouse is hard work.
    2. Just make sure your hands are clean.
    Read more ...

    01 January 2012

    My Lucky New Year's Foods (part 1): Orange Muffins with Hibiscus Icing

    Happy New Year! Buon Anno!
    I'm not one for "New Year's Resolutions". I get the whole New Year, new beginnings, clearing out things that don't serve us, etc... although I like to think we can (and should) act on beneficial changes and intentions at any time. As soon as you recognize, act. Right?

    That being said, I am sort of a sucker for traditions. Since it's New Year's Day, and this is a "foodie" sort of blog, I was thinking about lucky foods. Various cultures believe certain foods to be lucky and improve your odds of a great year. In Italy we eat lentils - they resemble coins and are symbolic of money. Other lucky vegan1 foods include: greens, cabbage/sauerkraut, grapes, other legumes, long noodles, and cakes & baked goods (typically round or ring-shaped).

    Like these ring-shaped muffins. The "mimosa" is non-alcoholic :-)

    Are you eating any lucky foods today? Greens are definitely on the menu here, but I also wanted to make a baked item. I did a little cross-blending of traditions with this recipe. Oranges are considered a lucky food during Chinese New Year; they represent wealth and good fortune. Oranges and foods made with oranges are traditionally shared and eaten at the New Year.

    These should be very lucky.
    While it is not the lunar new year, my father sent me a gift basket of straight-from-the-grove Florida oranges. The sweet juice and fresh orange zest were perfect for these Lucky New Year Muffins. Even though the vitamin C from the orange in the muffins was baked away, the Hibiscus Icing kicks back in a nice little boost of vitamin C.
    I chose to make them ring-shaped, for some extra New Year luck. I simply used a straw to poke/carve out the center. I'm sure they're just as lucky muffin-shaped.

    Low-Sugar Orange Muffins
    (makes 6)
    • 1 1/4 Cup (160g) All Purpose Gluten-Free Flour
    • 1/2 tsp. Baking Soda
    • 1/4 tsp. Cream of Tartar
    • 1 tsp Orange Zest
    • scant 1/4 tsp Sea Salt
    • 1 Chia Egg (1T Ground Chia + 3T Filtered Water)
    • 2 Tbsp (30g) Olive Oil
    • 2 Tbsp (30g) Earth Balance Coconut Spread (I was told this made the muffins richer/more buttery; if you're not into that, sub an equal amount of Applesauce)
    • 1/4 Cup Orange Juice
    • 1 Tbsp (10g) Coconut Sugar + 25-30 drops of Liquid Stevia (if you don't care for Stevia, omit and increase the Coconut Sugar to 3T (30g)
    • 1/2 tsp Vanilla Extract
    • Hibiscus Icing (see below)

    Oven 350F/180C


    Light grease a muffin tin with coconut oil or line with muffin cups. Prepare your chia egg in a small bowl or glass and set aside to thicken.
    In a separate small glass, combine the orange juice,coconut sugar, stevia and vanilla extract, and stir until the coconut sugar dissolves. 

    In a mixing bowl, combine the first five dry ingredients. Mix well. Add the olive oil and Earth Balance to the flour mixture and mix in, until the mixture becomes crumbly. Mix in the chia egg until it is fairly well distributed, then pour in the orange juice mixture and mix well.

    Spoon the batter into the muffin cups and bake for 17-20 minutes or until a toothpick inserted into the center comes out clean. Allow the muffins to cool for a few minutes before transferring to a cooling rack to cool completely before frosting with the Hibiscus Icing.

    Hibiscus Icing
    • 2 Tbsp Dried Hibiscus Flowers*
    • 3 Tbsp Orange Juice
    • 1 Tbsp Hot Water
    • 1 Tbsp (14g) Coconut Nectar or Agave
    • 15 drops Liquid Stevia (or sub with 1T Coconut Nectar or Agave and omit water)
    • 1/4 Cup (56g) Earth Balance Coconut Spread - slightly softened (you can sub Coconut Oil, if you prefer)
    • 1/4 Cup (30g) Tapioca Starch
    • Pinch of salt
    Soak the hibiscus flowers in the orange juice and water for 20-30 minutes. Add the sweetener and mix well. Stir in the tapioca starch until the mixture thickens, then mix in the Earth Balance and whisk together until uniform and even.
    Feel free to chill the icing for a few minutes before frosting over completely cooled muffins.

    *The icing is somewhat tart. Feel free to experiment with a lesser amount of hibiscus, if you'd like a mellower flavor.


    1. Pork and Fish are other "lucky" (and I say that hesitantly, seeing as how it's not so lucky for the pigs or the fish) New Year foods, in case you were interested.
    Read more ...